Author: Tyler Reed

  • How Much Does Yard Drainage Cost in Western Kentucky? 2026 Pricing for French Drains, Grading, and Catch Basins

    How Much Does Yard Drainage Cost in Western Kentucky? 2026 Pricing for French Drains, Grading, and Catch Basins

    The honest answer: there is no reliable flat price for yard drainage. The real number depends on the water problem, the length and depth of the work, where water can safely go, and what your soil and property access allow.

    If you are looking for a drainage contractor near you, there is also good news for winter planning: drainage corrections, grading, French drains, catch basins, and downspout work can sometimes be scheduled during the colder months. These projects do not automatically have to wait for spring. But saturated clay, mud, and freeze-thaw conditions can delay excavation or make it unwise to proceed.

    The right first step is a property visit. We’ll look at how water moves, discuss your goals, and put a real number on the work, without inventing a price before seeing the site.

    / Dept 01: What Are You Trying to Fix?

    The symptom is visible. The cause may be somewhere else.

    Water might collect beside your foundation, sit in a low area, run across a driveway, or leave a slope washed out. Those problems can have different causes, and different solutions.

    Before pricing a fix, a contractor should look at the problem area and the surrounding grades. Where does water come from? Where does it travel during rain? Is a downspout discharging beside the house? Is a low spot trapping runoff? Is clay slowing the water’s movement? Is there a safe place to send water once it is collected?

    Sometimes the right answer is a grading adjustment. Sometimes it is a French drain, catch basin, downspout extension, or a combination of work. A drain added without a suitable route and discharge point may simply move the problem to another part of your property.

    For a closer look at the different drainage approaches, read our French drain installation guide for Western Kentucky homeowners and our French drain article for Paducah. This cost guide focuses on what shapes a bid, not how to install a particular system.

    / Dept 02: What Drives the Cost?

    A useful estimate is built around your property, not a generic price table.

    These are the main factors that determine the scope and cost of yard drainage work:

    1. Length of the system. A longer trench, pipe run, or downspout route generally requires more excavation, material, and installation time.
    2. Trench depth and conditions. Deeper work takes more excavation. Western Kentucky clay can be difficult to work when wet and may require a different approach than easier, drier soil.
    3. The discharge point. Water needs a safe destination. The available outlet, the distance to reach it, elevation, and the route all affect the work.
    4. Grading needs. A drain may not solve the whole problem if the surrounding surface still directs water toward the house or leaves it trapped in a low spot.
    5. Catch basins and connections. A basin may be useful where surface water collects, but it adds components and connections to the project.
    6. Access and restoration. Tight access, existing landscaping, hard surfaces, and the area that needs repair or restoration after excavation all matter.

    That is why an online “French drain cost” average cannot tell you what your property will require. Two yards can have similar water problems and very different layouts, soil, access, and outlets.

    Graded residential site with a clean transition between lawn and gravel

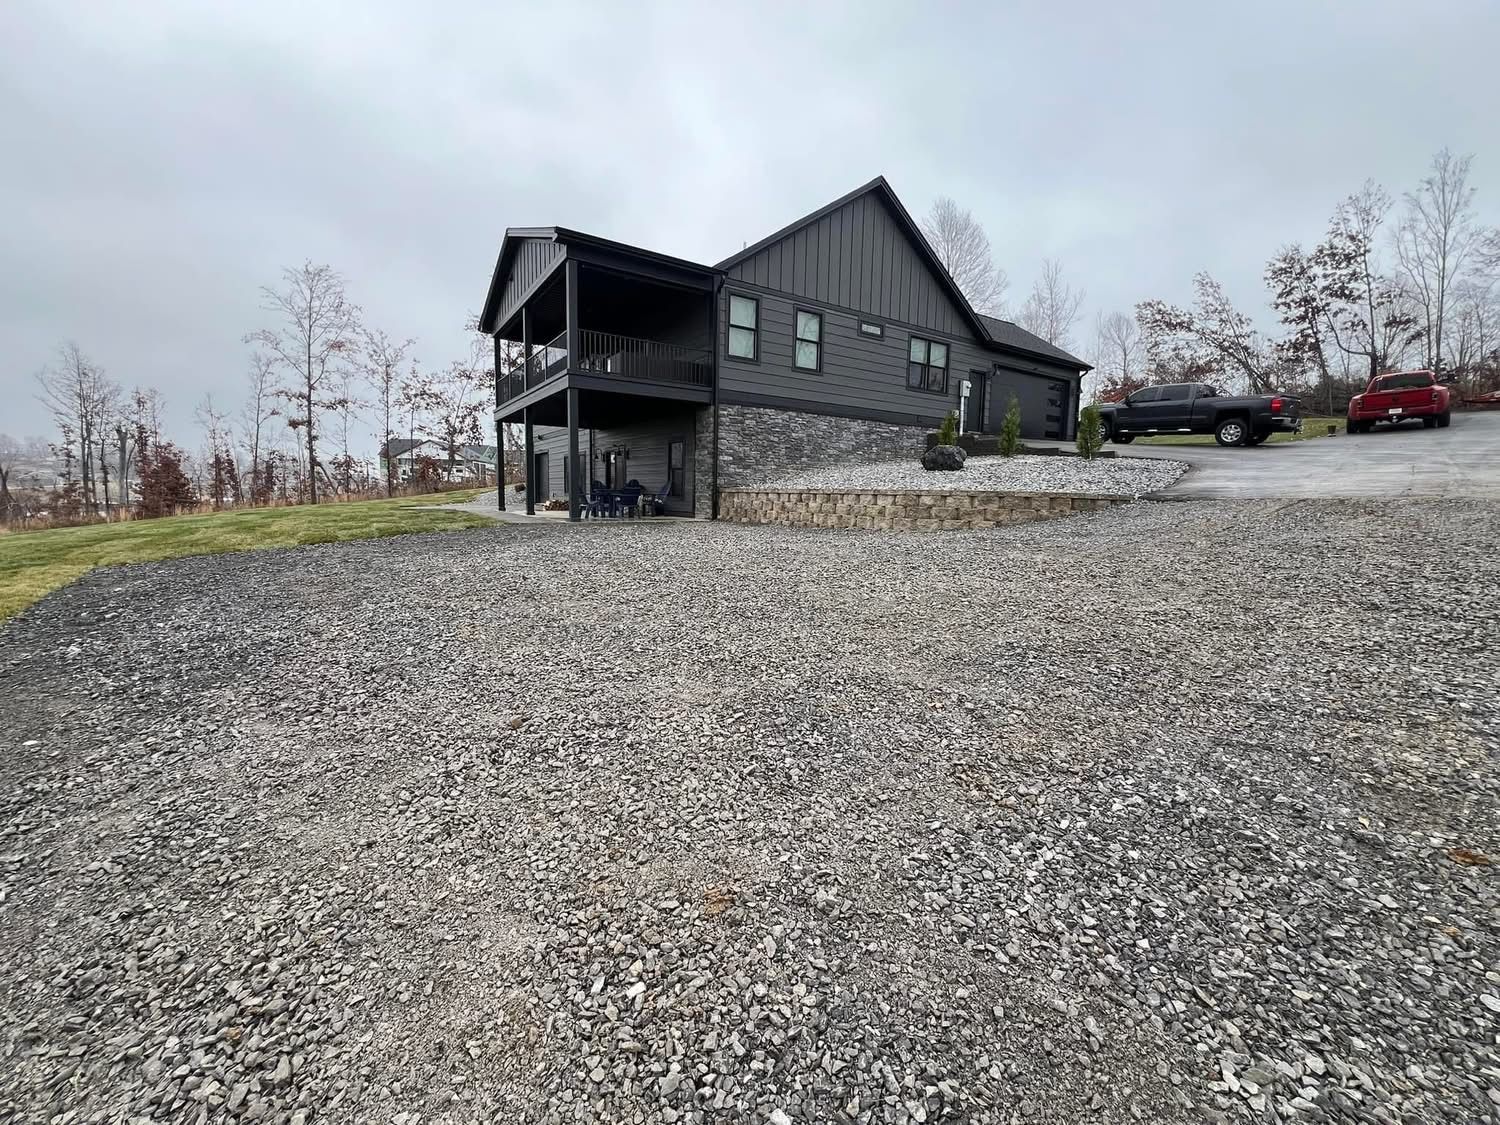
    Finished grading and a clear lawn-to-gravel transition. The photo shows site work, not a visible French drain installation.

    / Dept 03: French Drains, Grading, Basins, and Downspouts

    The fix should match how water is reaching, and leaving, the problem area.

    A French drain can be appropriate when water needs to be collected below the surface and carried toward a planned outlet. Its cost depends on the route, length, depth, soil, access, and discharge design. The fact that a trench can be dug does not, by itself, mean a French drain is the right choice.

    Grading changes the shape of the ground so surface water has a better path. The amount of work depends on the size of the area, existing elevations, soil, and where runoff can be directed without creating another issue.

    A catch basin can collect surface water at a low point and connect it to a drainage route. Its placement and connection to the rest of the system matter; it should be part of a plan, not an isolated grate in the yard.

    Downspout work may involve directing roof runoff farther from the foundation or connecting it to a suitable drainage route. The distance, obstacles, and discharge location shape the scope.

    The Muscle provides dirt work, grading, and drainage installation in Western Kentucky. If drainage is part of a patio or broader outdoor project, it should be coordinated with that project’s grades and construction, not left as a last-minute add-on. Our outdoor living cost guide covers other factors that can affect a larger outdoor build.

    / Dept 04: Can Drainage Work Be Scheduled in Winter?

    Yes, some drainage work can be planned and completed now, when site conditions support it.

    Winter is not an automatic shutdown for grading, French drains, catch basins, or downspout corrections. For some properties, addressing water movement during the colder months can help get ahead of the next stretch of heavy rain and spring runoff. It can also help you line up work while planning a larger project for later.

    But “workable in winter” does not mean “workable in every winter condition.” Saturated clay can turn to mud, limit equipment access, and make it difficult to leave a clean, stable finish. Freeze-thaw cycles can change the condition of the ground from one day to the next. Frozen ground can also make excavation impractical. If the site cannot support the work, the responsible choice is to pause or adjust the schedule.

    We can assess your property now, discuss a practical scope, and identify what may be possible during a suitable weather window. The site conditions, not a blanket promise, determine whether excavation should proceed.

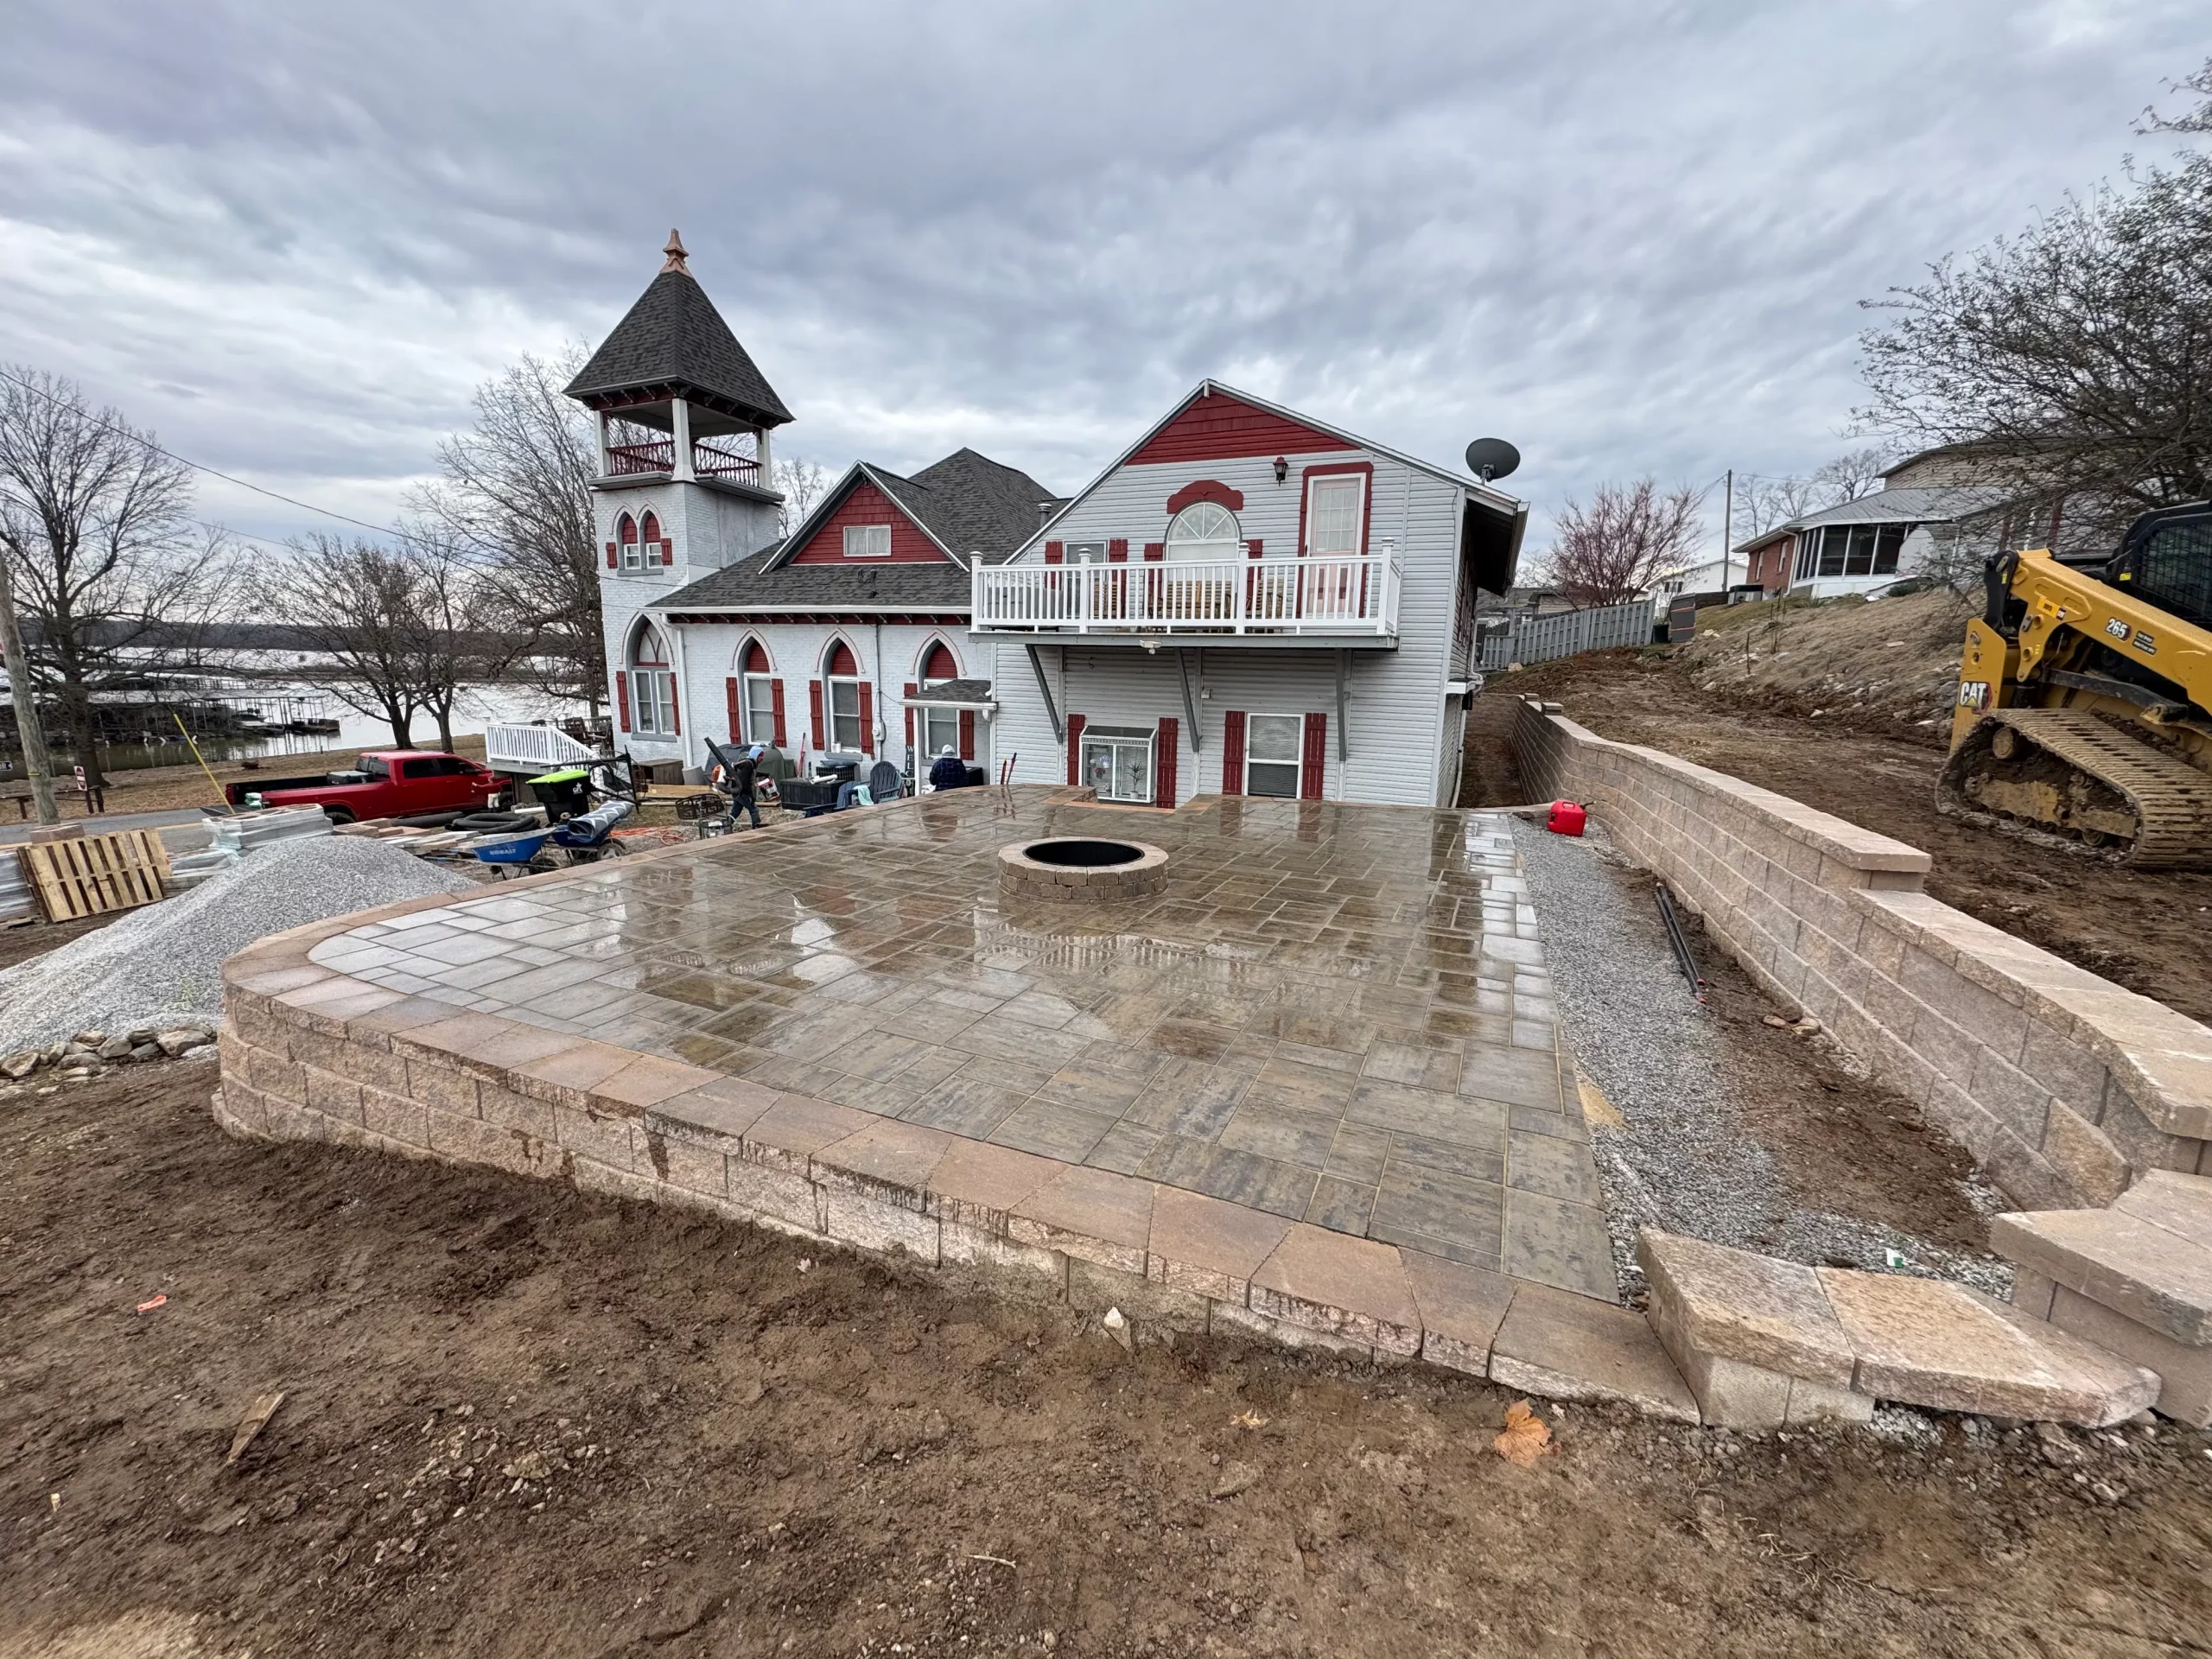
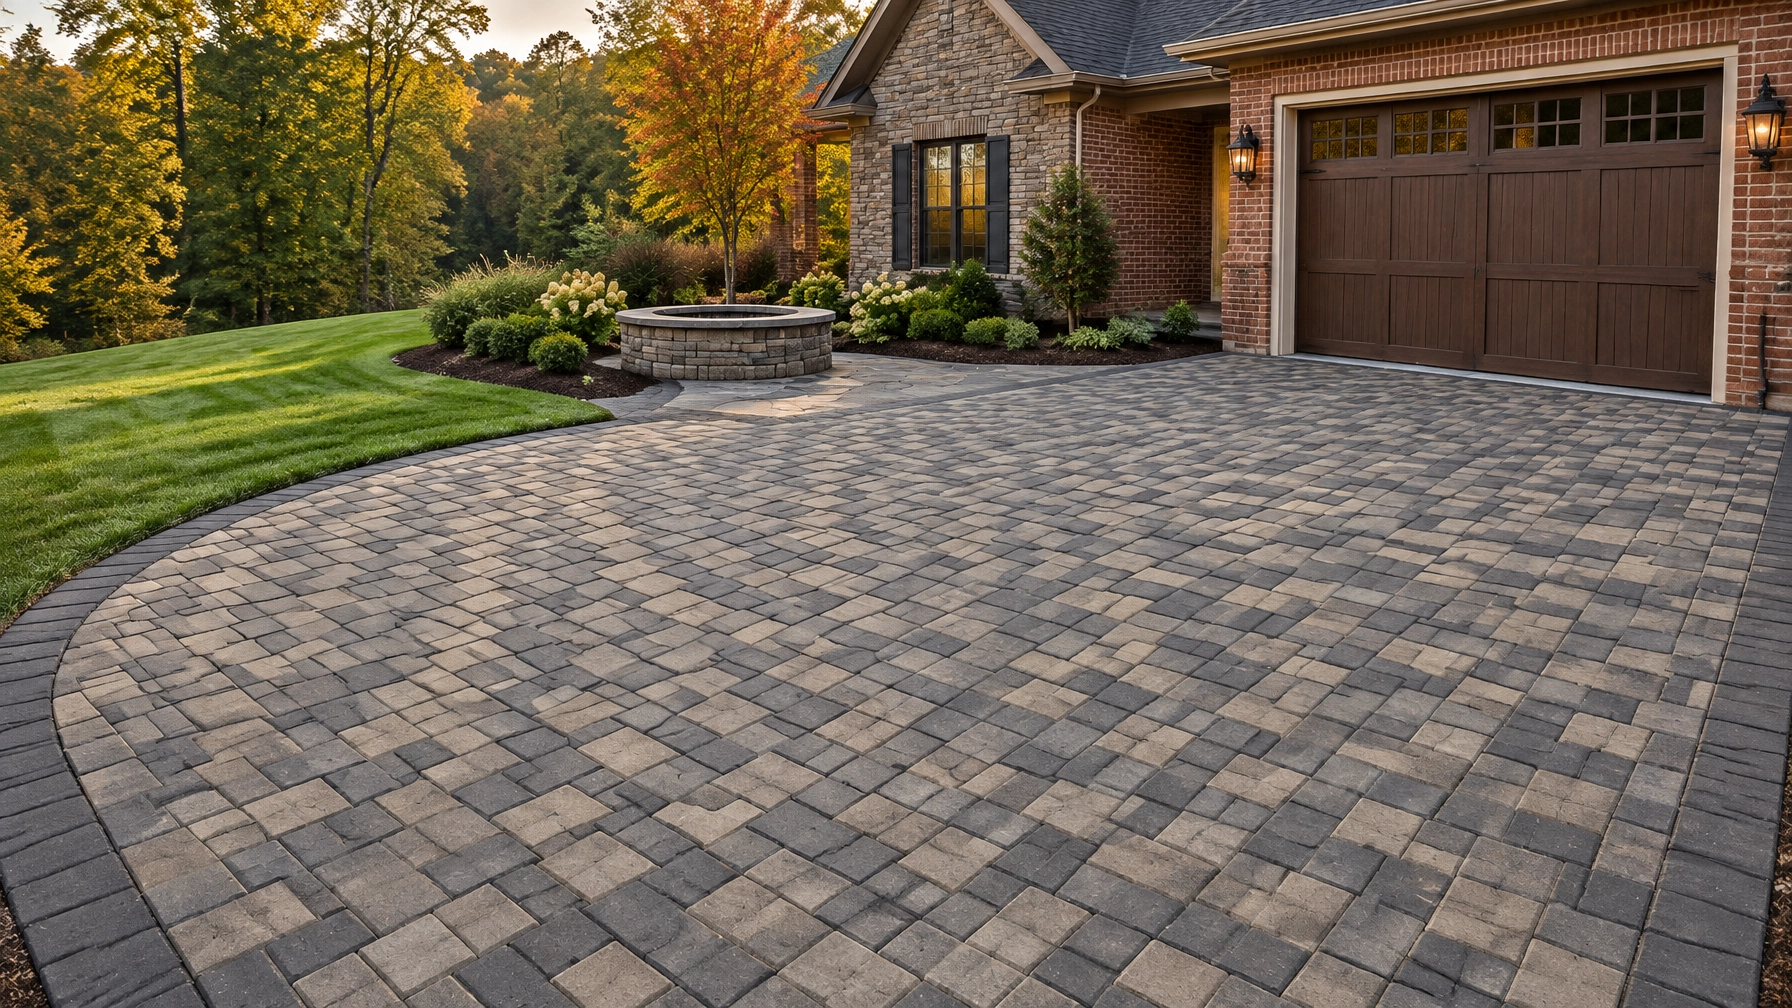
    Finished paver patio with gravel drainage transition beside the home

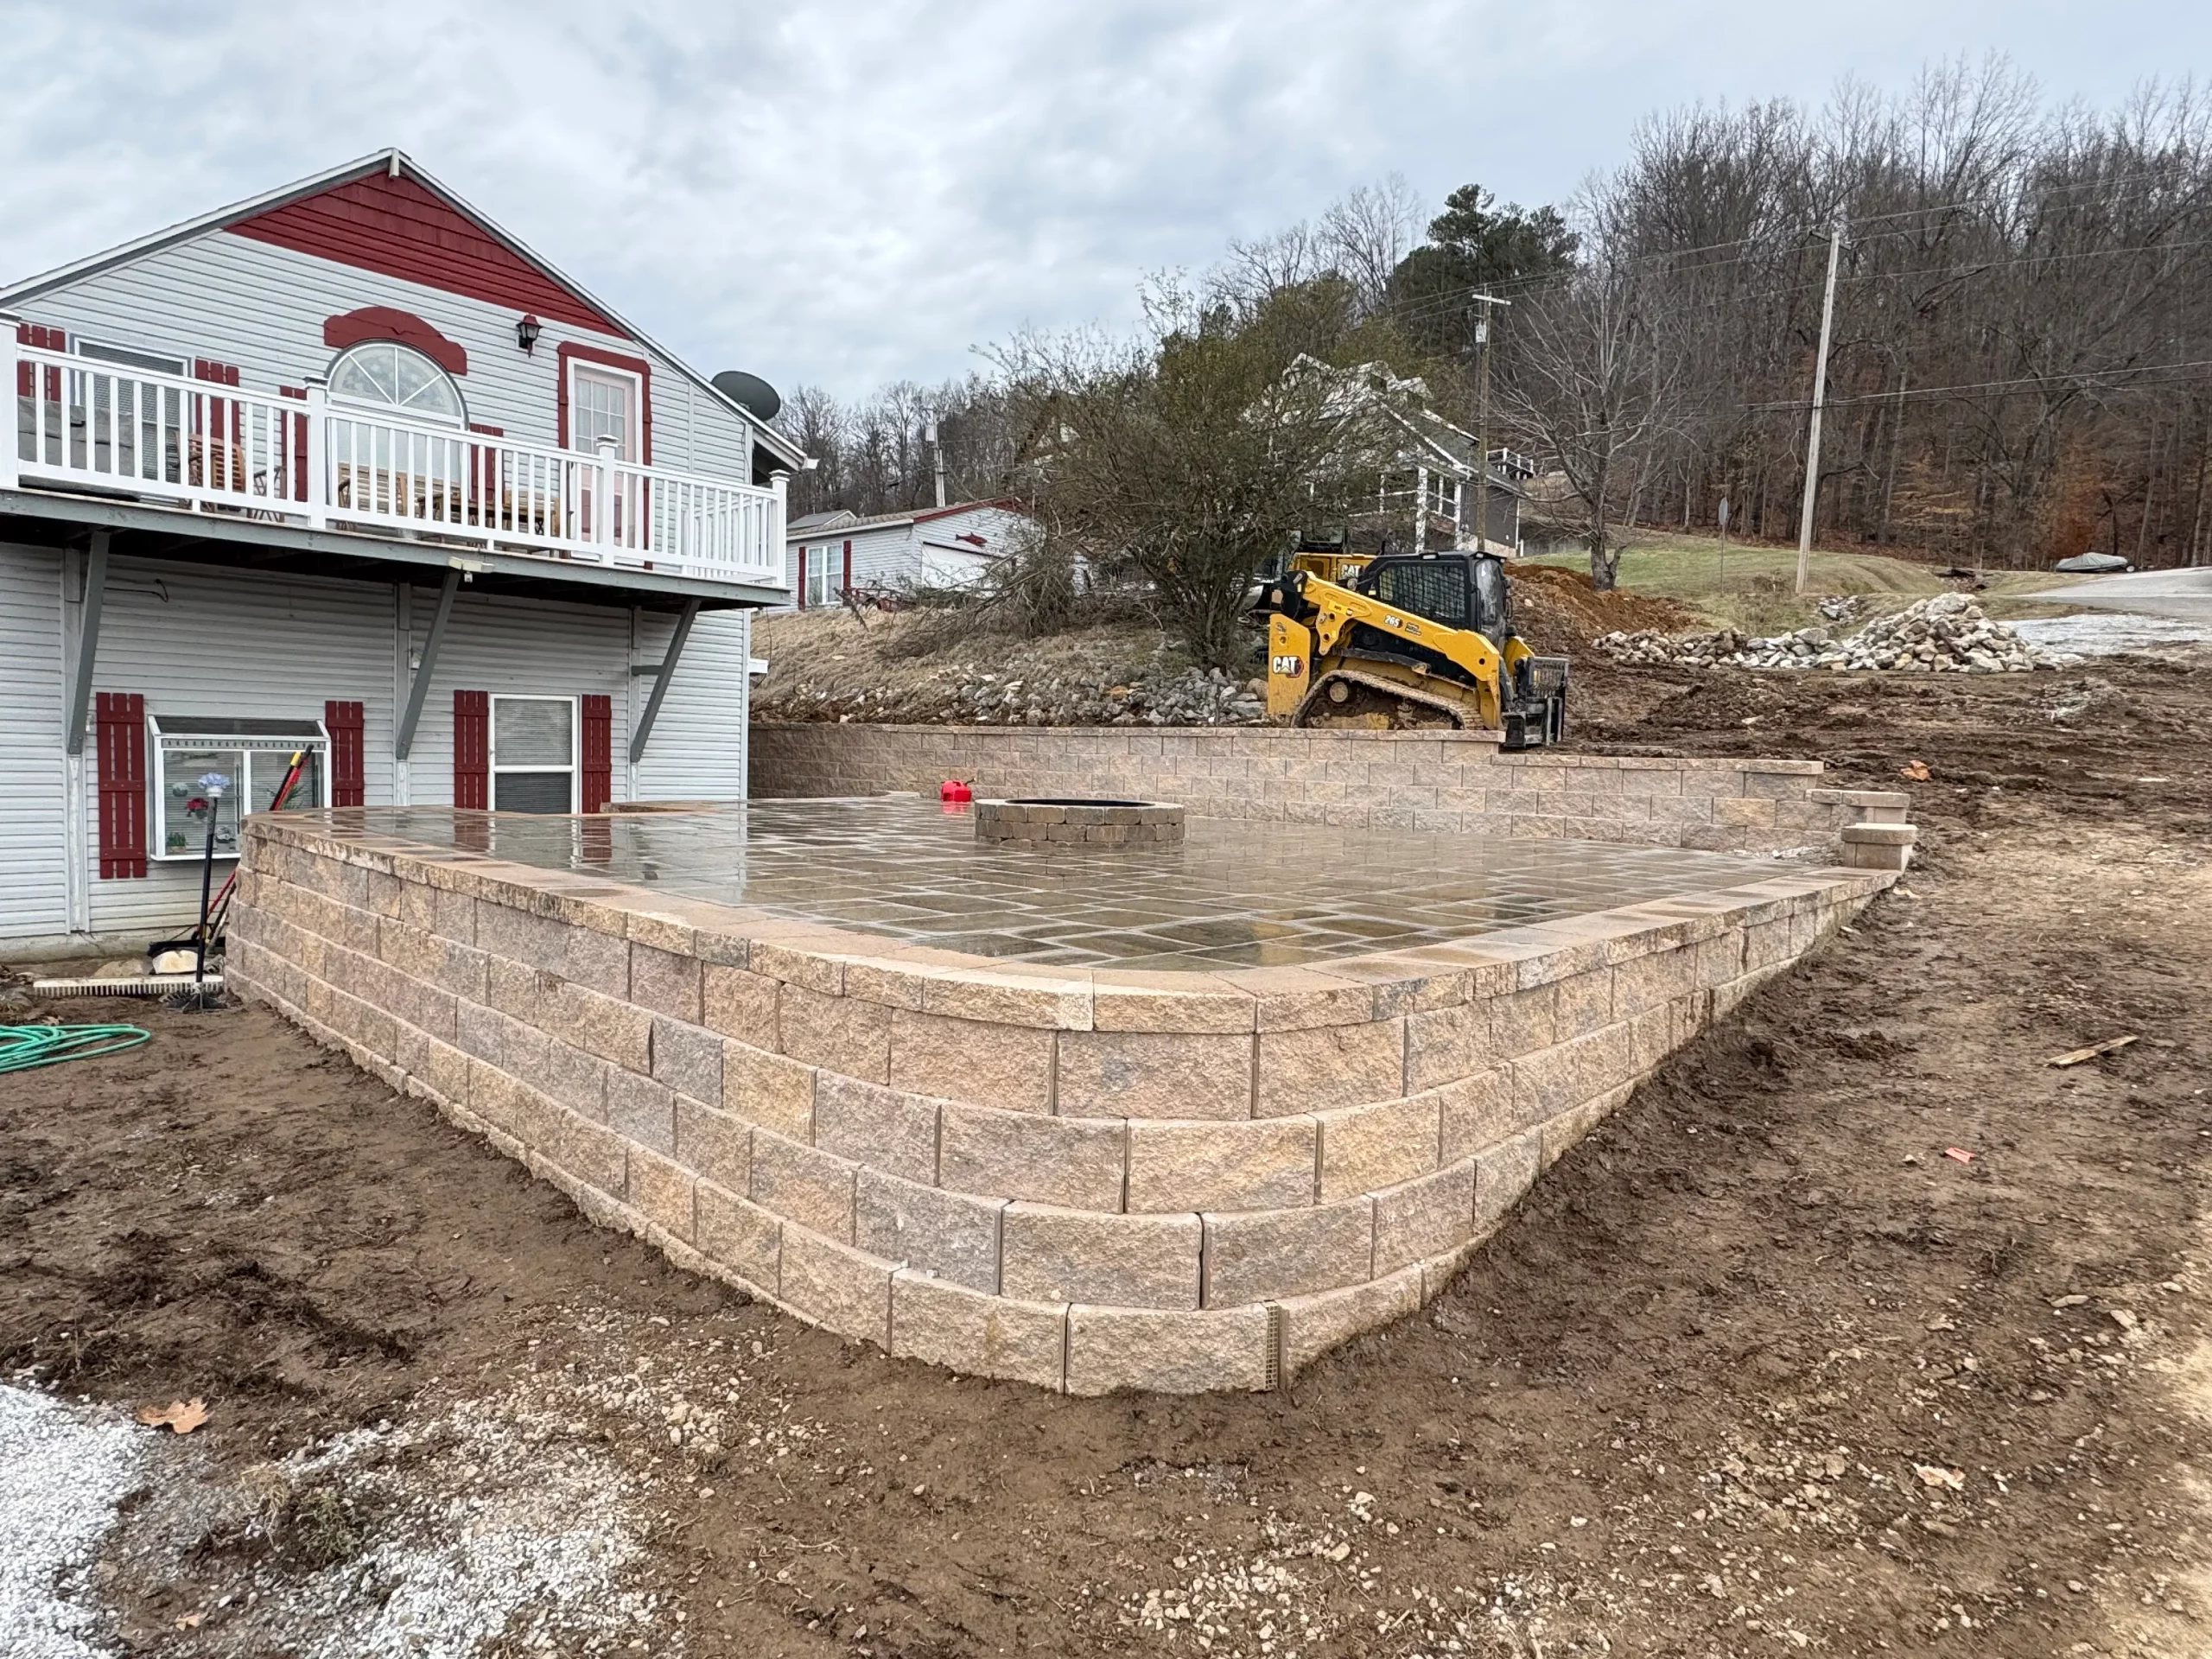
    Finished patio with a gravel transition beside the house. Drainage planning matters where hardscape, roof runoff, and surrounding grades meet.

    / Dept 05: Why Western Kentucky Clay Matters

    Water does not disappear just because it has been moved a few feet.

    Clay-heavy soil can hold water and drain slowly. That affects excavation, grading, and the design of a drainage route. The plan needs to consider where water collects, how it will be carried, and where it can be released without causing another problem.

    Freeze-thaw cycles add another reason to consider the whole system. Water that remains in the ground can freeze and thaw as conditions change. A contractor should account for that seasonal movement and avoid treating a visible puddle as the entire problem.

    Lakefront properties near Kentucky Lake or Lake Barkley can bring additional slope, access, and runoff considerations. If your property is close to the shoreline, the discharge route and the location of the work deserve careful review. Requirements can depend on the property and proposed work, so do not assume a solution that works inland will suit every lakefront site.

    Excavation and grading underway on a sloped waterfront property

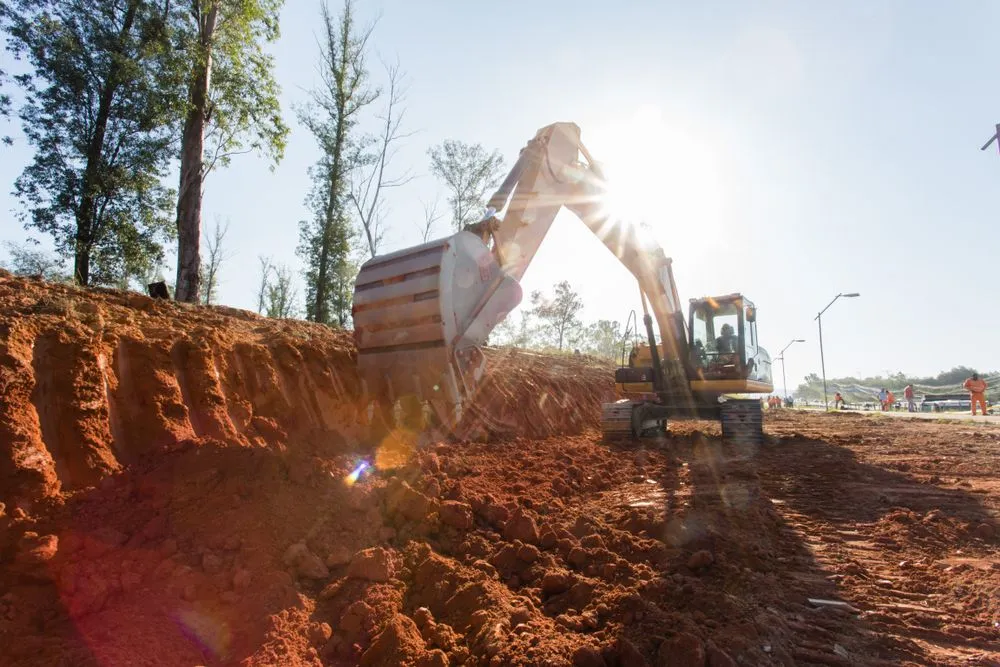
    Site work on a sloped waterfront property. Steep ground and equipment access can affect drainage planning and project scope.

    / Dept 06: Get a Real Number for Your Property

    A property visit is how we replace guesswork with a clear scope.

    When we look at your yard, we need to understand the wet areas, the route water takes, nearby downspouts, slopes, access, and possible outlets. If you have photos taken during or after rain, they can help show where the problem appears. It also helps to describe when the issue occurs and whether it is getting worse.

    A clear estimate should explain the work being proposed: what is being excavated or regraded, where the drainage components will go, how water will be routed, and what restoration is included. If part of the job depends on weather or ground conditions, that should be discussed plainly.

    The Muscle’s team stays involved in the work, is insured, and is professionally trained. For hardscape projects connected to a drainage plan, The Muscle is also a Unilock Authorized Contractor: a relevant credential when the project includes applicable Unilock pavers or wall systems, not a claim that Unilock certifies drainage work.

    / Next Step: Request a Bid

    You can start the conversation now, even if the ground needs a better work window.

    If standing water, runoff, a wet foundation area, or a soggy yard is affecting your property, tell us what you’re seeing. We’ll discuss the site, explain which options may fit, and put a real number on the proposed work after evaluating the property.

    Request a Bid or call (270) 248-9790. The contractor packet is available as a secondary reference.

    No pressure. No invented price table. Just a zero-obligation conversation about what your yard needs and whether winter conditions make sense for the work.

    13-Item SEO Package

    1. SEO title: Yard Drainage Cost in Western Kentucky: 2026 Guide
    2. Meta description: What affects French drain, grading, catch basin, and downspout costs in Western Kentucky? Learn the main pricing factors and how winter conditions affect scheduling.
    3. Suggested URL slug: yard-drainage-cost-western-kentucky-2026
    4. Primary keyphrase: yard drainage cost Western Kentucky
    5. Secondary keyphrases: drainage contractor near me; French drain cost; French drain installation; catch basin installation; yard grading and drainage
    6. Search intent: High-purchase-intent local research by property owners looking for drainage help and an estimate.
    7. Excerpt: There is no one-size price for yard drainage. Learn what drives the cost of French drains, grading, catch basins, and downspout work, and what may be scheduled during winter in Western Kentucky.
    8. Content category: Drainage & Dirt Work
    9. Tags: yard drainage, French drains, grading, catch basins, downspouts, Western Kentucky, winter projects
    10. Hero image alt text: Graded residential property with gravel surface and retaining wall, showing finished site work and water-management considerations
    11. Social title: How Much Does Yard Drainage Cost in Western Kentucky?
    12. Social description: See what affects drainage project costs, from trench length and depth to soil, access, discharge, grading, and winter work conditions.
    13. Recommended internal links: Dirt work, grading, and drainage; French drain installation guide; French drain Paducah article; outdoor living cost guide; Request a Bid.
  • How to Plan a Low-Maintenance Patio That Feels Like an Outdoor Living Room

    How to Plan a Low-Maintenance Patio That Feels Like an Outdoor Living Room

    / Dept 01, Start with how you’ll use it
    A patio works best when it makes everyday time outside feel natural, not when it’s simply a large, empty patch of pavers.

    An outdoor living room doesn’t need an elaborate wish list. It needs a solid surface, comfortable places to sit, useful lighting, and a layout that fits how you actually spend time at home. For homeowners across Western Kentucky, that plan also needs to account for clay soil, water movement, and freeze-thaw weather.

    That focus is reflected in recent industry trends. The 2026 U.S. Houzz Outdoor Trends Study reports that 83% of renovated outdoor spaces include a lounge or seating area, and 66% of lounge areas include outdoor lighting. The National Association of Landscape Professionals’ 2026 trend outlook likewise highlights comfortable, flexible outdoor rooms and durable improvements homeowners can enjoy over time.

    The practical takeaway: plan the experience first, then choose the materials and features to support it.

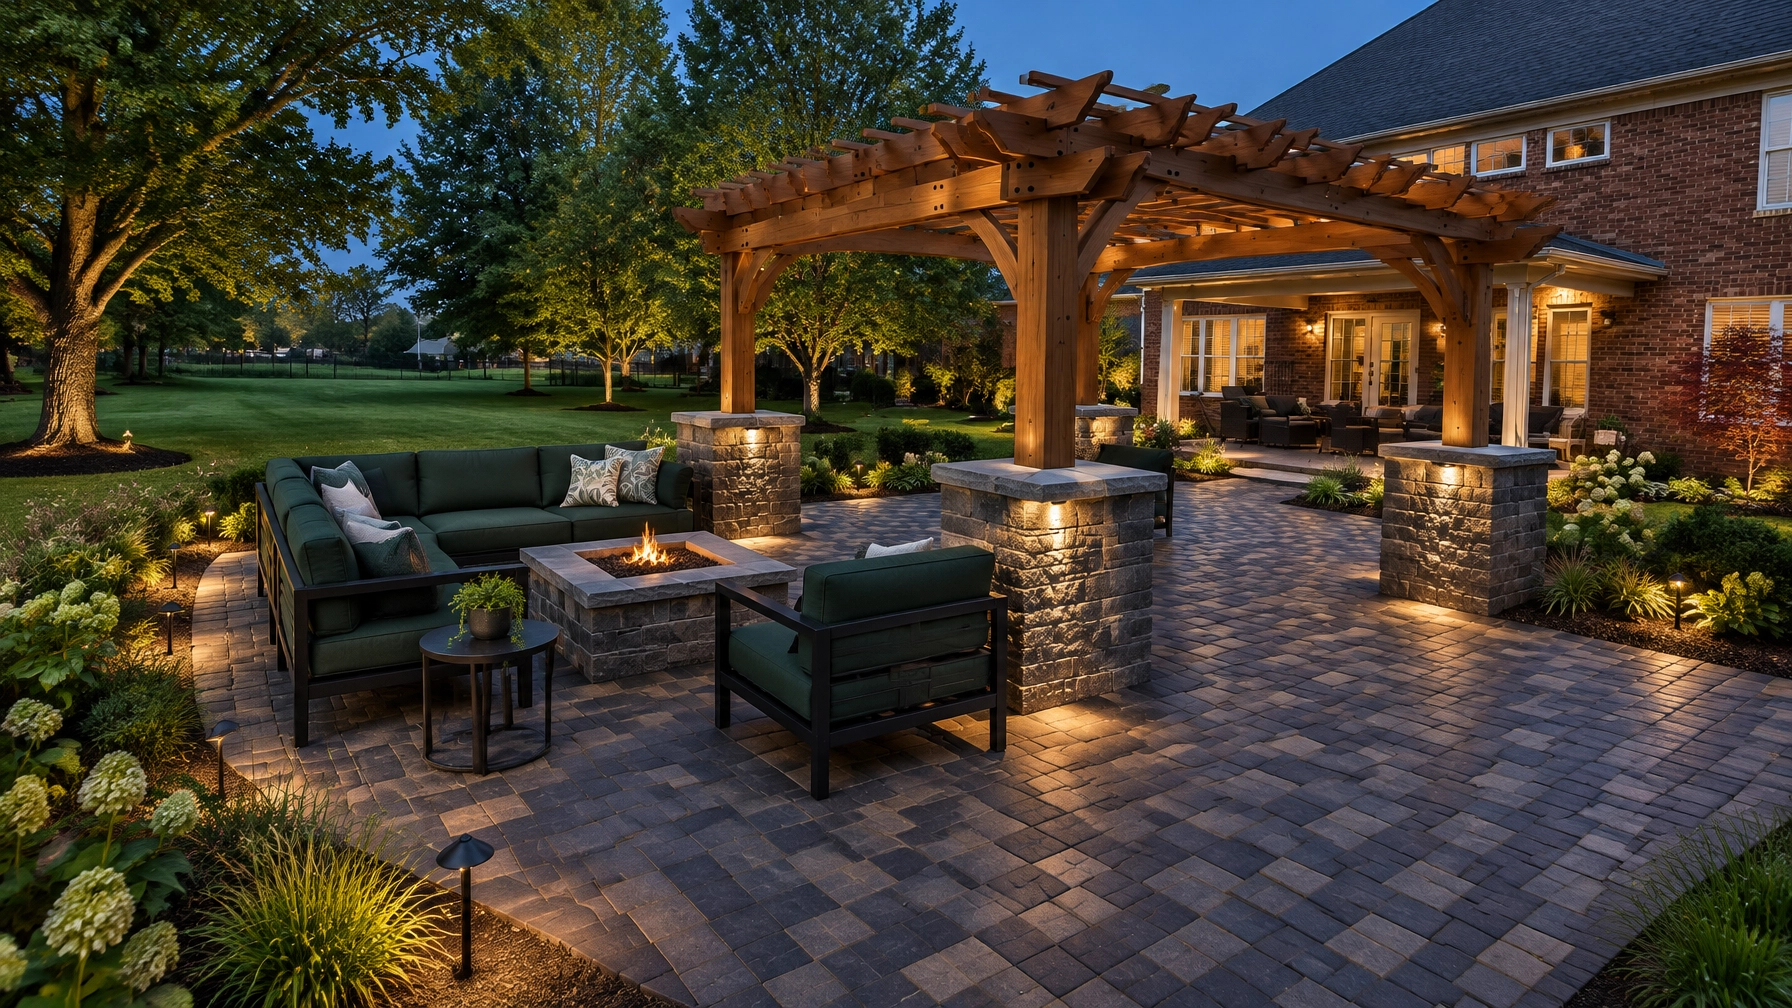
    Planning inspiration image, not a documented The Muscle installation.

    / Dept 02: Map out the zones

    Good layouts make a patio feel useful without making it feel crowded.

    Before choosing a paver color or pattern, think through a typical evening at your home. Where will you sit? Where will people walk in from the house? Do you want a table for meals, or would a lounge area serve you better?

    A simple layout can include:

    1. Lounge zone: Room for chairs or a sofa, plus space to move around them comfortably.
    2. Dining zone: A table that fits your household and guests without blocking the main route.
    3. Clear connection: An easy path between the patio, house, yard, and any steps or doors.

    You may not need all three zones. A smaller patio planned around one generous seating area can feel more inviting than a larger surface with too many features competing for space.

    To test your ideas, mark the proposed patio edges and furniture footprints on the ground. Then walk the routes. A plan that looks balanced on paper should still feel natural when you’re carrying food outside or moving chairs around.

    Planning inspiration showing distinct lounge and dining zones on a slate-gray paver patio

    / Dept 03, Choose materials for real life

    Low maintenance starts with durable choices and a well-built foundation.

    Pavers offer a finished, structured surface for everyday use, and the overall look can be tailored to complement your home. For a paver patio in Western Kentucky, material selection is only part of the decision. The installation beneath it matters just as much.

    Clay soil can hold water and become soft after heavy rain. If the base isn’t prepared for the site, surface movement can become a problem over time. Freeze-thaw cycles add another reason to build with care: trapped moisture and inadequate preparation can contribute to shifting or uneven areas.

    That’s why a patio plan should address excavation, base preparation, edge restraint, and surface drainage, not just the pavers you see at the finish. The right approach depends on your yard, slope, soil, and how water moves around the house.

    The Muscle is a Unilock Authorized Contractor. As you compare materials, ask how the proposed pavers suit your intended use and what the installation includes. A clear scope helps you understand what you’re buying and reduces the chance of surprises later.

    / Dept 04, Make water part of the plan

    A comfortable patio should shed water thoughtfully, not send it toward your house.

    Drainage is not a finishing detail to sort out after the patio is built. It belongs in the plan from the start. The patio surface, nearby downspouts, existing slopes, and surrounding landscape all affect where rainwater goes.

    In a region with clay-heavy soils, simply directing runoff into the nearest low spot may not solve the issue. The site may need grading changes or a planned drainage route. A contractor should look at how water behaves during and after rain, not just how the space looks on a dry day.

    If you’re planning a patio near Kentucky Lake or Lake Barkley, verify property boundaries and any applicable shoreline or easement requirements before finalizing the design. Projects involving shoreline work may require review; check with TVA about Section 26a permits when relevant.

    Planning inspiration for a lakeside paver patio with a clear layout, planting beds, and a view toward wooded surroundings

    / Dept 05: Design for less upkeep

    Simple, considered choices can keep routine maintenance manageable.

    “Low maintenance” doesn’t mean no maintenance. It means avoiding choices that create more work than you want to take on.

    Start with the paved surface. Ask what ordinary cleaning looks like, how joints are maintained, and what care the selected pavers call for. Then consider the landscape around it. A defined planting bed with suitable, easy-care plants can soften the edge of the patio without turning every weekend into a gardening project.

    A few practical ways to keep the plan manageable:

    1. Keep the layout purposeful. Every extra corner or feature can add a place to clean or maintain.
    2. Choose planting for the site. Match plants to sun, shade, and soil conditions instead of relying on looks alone.
    3. Plan for leaf cleanup. Nearby trees can be valuable for shade, but their leaves will land somewhere.
    4. Put lighting where it helps. Focus on seating, steps, and walking routes rather than adding fixtures without a clear purpose.
    5. Think ahead about furniture. Weather-resistant pieces and a sensible storage plan can make seasonal care simpler.

    For more on how the company approaches custom patios and outdoor living areas, see The Muscle’s hardscape service. If planting is part of the project, explore landscape installation as well.

    / Dept 06, Add lighting and comfort

    The right details help you use the patio after sunset, too.

    Outdoor lighting was the most frequently upgraded outdoor system in the Houzz study, with 77% of homeowners making an upgrade. For your patio, the goal isn’t to fill every corner with light. It’s to make the space comfortable and easier to move through once daylight fades.

    Consider practical lighting near steps and routes, plus softer illumination near seating or planting. If you’re planning electrical fixtures, discuss their placement and installation requirements with the appropriate professional as part of the project plan.

    Comfort comes from more than lighting. Shade can make a sunny patio more usable; a fire feature may create a natural gathering point on cool evenings. These additions aren’t essential to every project, but they can make a straightforward patio feel like an outdoor room. Decide which one would make the biggest difference to your routine before adding multiple features.

    Planning inspiration showing a finished slate-gray paver patio with a compact fire feature, seat wall, and subtle evening lighting

    / Dept 07, Put a real number on the project

    A useful budget starts with the actual site and scope.

    As a planning range, paver patios can run about $26–$50 per square foot, depending on materials and the nature of the job. Treat that as a starting point, not a quote for your property.

    Site access, excavation, grading, drainage needs, shape, selected materials, and additional features all affect the final number. A straightforward layout on a suitable, accessible site is different from a sloped yard that needs extensive preparation or drainage work.

    When you request a bid, ask what the proposed scope includes. A transparent estimate should make it easier to compare the work being described, not just the number at the bottom. The Muscle’s family-run team is fully insured and works directly on projects, from the initial conversation through the installation. The company’s project gallery offers examples of completed outdoor work.

    / Next Step: Request a bid

    Talk through your space, your goals, and the site conditions, no pressure.

    The Muscle Lawncare & Landscaping LLC serves homeowners across Western Kentucky, Southern Illinois, and Northern Tennessee, including Murray, Paducah, Mayfield, Benton, Calvert City, and the Kentucky Lake and Lake Barkley regions.

    If you’re considering a paver patio, Request a Bid or call (270) 248-9790. Share what you want the space to do, and the team can take a look and put a real number on the project.


    SEO Package

    1. SEO title: How to Plan a Low-Maintenance Paver Patio in Western Kentucky
    2. Meta description: Plan a low-maintenance paver patio with comfortable seating, practical lighting, drainage, durable materials, and realistic cost guidance for Western Kentucky.
    3. Suggested URL slug: plan-low-maintenance-paver-patio-western-kentucky
    4. Primary keyphrase: low-maintenance paver patio Western Kentucky
    5. Secondary keyphrases: outdoor living room patio; paver patio cost Western Kentucky; paver patio design; patio drainage Western Kentucky
    6. Search intent: Homeowners researching paver patio design, planning, and budget before requesting a bid.
    7. Excerpt: A well-planned paver patio can feel like an outdoor living room without creating unnecessary upkeep. Start with how you’ll use the space, then plan seating, lighting, drainage, materials, and budget.
    8. Content category: Paver Patios & Outdoor Living
    9. Tags: paver patio, outdoor living, patio planning, patio lighting, drainage, Western Kentucky
    10. Hero image alt text: Finished charcoal and slate paver patio arranged as a comfortable outdoor living room with green cushions and landscape lighting
    11. Social title: Plan a Low-Maintenance Patio That Feels Like an Outdoor Room
    12. Social description: Make your patio more comfortable and practical with clear seating zones, low-maintenance materials, lighting, and a plan for Western Kentucky drainage and soil.
    13. Recommended internal links: Hardscapes, Landscaping, Project Gallery, and Request a Bid.
  • Retaining Walls on Kentucky Lake and Lake Barkley: What Changes When Your Yard Meets the Water

    Retaining Walls on Kentucky Lake and Lake Barkley: What Changes When Your Yard Meets the Water

    A lake place should be ready for weekends, not waiting on another round of yard work. But when a steep yard meets Kentucky Lake or Lake Barkley, a retaining wall is more than a way to make a slope look tidy. Drainage, soil, lake access, and shoreline rules all shape what can be built and where.

    For homeowners around Eddyville, Cadiz, Grand Rivers, and Gilbertsville, the first question is not just, “What kind of wall do I want?” It is: Where does the project sit in relation to the shoreline, and what is the wall expected to do?

    / Dept 01: Start With the Shoreline

    A wall on private upland and a wall at the water’s edge are different projects.

    A retaining wall set back from the lake may be designed to create usable yard space, support a patio, or manage a grade change. A wall that reaches federally managed shoreline, or that requires fill or work in regulated waters, can involve a separate approval process.

    Do not use the visible waterline as your property boundary. The controlling line can be different, and requirements depend on the parcel and the proposed work. Before clearing, excavating, placing rock, or bringing equipment down a slope, confirm the boundary and ask the relevant agency what applies.

    On Kentucky Lake, some shoreline is managed by TVA. Under TVA’s shoreline stabilization regulation, a retaining wall on TVA-owned residential access shoreland is allowed only in limited circumstances: erosion must be severe and TVA must determine that a wall is the most effective option, or the new wall must connect to an existing TVA-approved wall. A wall on private upland is not automatically subject to that specific rule, but work near regulated shoreline may still need review.

    On Lake Barkley, the current U.S. Army Corps of Engineers Regional General Permit 25-RGP-01 does not authorize retaining walls, seawalls, bulkheads, vertically stacked stone, or stacked gabion baskets as shoreline stabilization under that permit. It does not mean every project has the same answer: the Corps’ shoreline rules, location, and permit pathway matter. If work is on Corps property, a Shoreline Use Permit is required before work covered by the permit proceeds.

    Water-access stairs are a separate part of the conversation. The regional permit includes a narrow category for certain ramps, stairs, and other water-access work, with specific limits and review requirements. It is not blanket permission to build steps anywhere on the bank.

    The practical takeaway: identify the shoreline manager and ask about your exact parcel and plans before design or construction. Do not assume a conventional retaining wall is allowed at the water’s edge.

    / Dept 02: Design for the Yard You Actually Use

    A good lakefront plan makes the time you spend outside easier.

    Many lake homes are weekend places or seasonal properties. Owners want a dependable route from the house to the patio, room to gather, and fewer fussy areas that need constant attention. A retaining wall can help create that usable layout, but only when it fits the site.

    1. Create level space where it earns its keep. A terrace can make room for a seating area, grill, or paver patio without turning the whole yard into a maintenance project.
    2. Connect the levels comfortably. Steps can make a steep yard easier to move through. Their alignment, landing areas, and relationship to the water need to be considered early.
    3. Keep runoff under control. Surface grades, roof drainage, and patio runoff should not send water behind a wall or toward a neighboring property.
    4. Choose finishes for regular use. Caps and walking surfaces should suit how you plan to use the space and how much upkeep you want to take on.

    A low-maintenance plan still needs a drainage path and occasional attention. It simply puts your effort into enjoying the property rather than constantly correcting avoidable problems.

    Retaining wall installation detail showing prepared base material and wall construction

    / Dept 03: Treat Drainage as Part of the Wall

    In Western Kentucky, what happens behind the wall matters as much as the face.

    Clay-heavy soils common in the region can hold water and drain slowly. When water collects behind a wall, the saturated soil adds pressure. A clean-looking block face cannot compensate for poor drainage, an unstable foundation, or runoff flowing into the backfill.

    A site-specific wall plan may include free-draining aggregate behind the wall, a drainage pipe, and grading that directs surface water away. The outlet needs to be considered too: water should not simply be moved to another problem area or discharged where it creates erosion.

    Lakefront sites can add complications. Steep grades, narrow access, shifting water levels, wave exposure, and erosion at the lower slope all affect the plan. A wall supporting a patio or lawn terrace may not be the right solution for shoreline erosion. Those are distinct problems, and the site needs to be evaluated as a whole.

    Freeze/thaw cycles matter as well. Water in saturated soil can freeze and expand, then leave loosened material when it thaws. A wall’s base, drainage details, and backfill should be selected for the actual conditions, not treated as afterthoughts.

    Retaining wall construction progress around a prepared outdoor surface

    / Dept 04: Build the Wall Around the Slope

    The taller the wall or the more it supports, the more the surrounding ground matters.

    A wall supporting a simple garden bed is not the same job as one holding back a steep slope beside a patio, driveway, or building. Nearby loads, soil conditions, wall height, and the shape of the slope can change what the design requires. In some cases, an engineer’s assessment may be appropriate.

    Before construction, the team should understand what lies below the finished face: excavation depth, the condition of the subgrade, base preparation, drainage, and any reinforcement required by the selected wall system. These details are hard to judge after the wall is complete, but they help determine whether the finished work has a sound foundation.

    The layout should also account for how the wall meets steps, patios, and upper grades. A retaining wall that solves one grade change but leaves awkward access or sends runoff toward the house has not solved the whole problem.

    Retaining wall sections and grading taking shape during installation

    / Dept 05: Make the Plan Before the Weekend

    A clear scope now can prevent a frustrating surprise later.

    Before requesting a bid, gather a few basics:

    1. Mark the area you want to improve. Photos from the house, patio, and shoreline help show how the grades connect.
    2. Describe how you want to use it. Tell the contractor whether you’re planning a seating area, paver patio, safer route down the slope, or simply a more usable yard.
    3. Share what you know about the shoreline. Include surveys, prior approvals, easements, or earlier shoreline work if you have them.
    4. Point out where water goes. Mention pooling, washouts, wet spots, roof downspouts, and places where runoff crosses the property.
    5. Ask what is included. Clarify the wall, drainage, steps, access, finish work, and any separate approvals or engineering that may be needed.

    The Muscle Lawncare & Landscaping LLC serves Western Kentucky, Southern Illinois, and Northern Tennessee. We are a Unilock Authorized Contractor, and our retaining wall service can be considered alongside hardscape and outdoor living work. The crew that quotes the work builds it, and the company is fully insured. Our goal is to explain the scope plainly, put a real number on the work, and stand behind the installation.

    For more on the details that affect wall performance, read our guides to retaining wall materials and what to check before winter.

    / Dept 06: Make the Next Step a Conversation

    You do not need a finished design to start asking the right questions.

    If you own a lake home near Eddyville, Cadiz, Grand Rivers, or Gilbertsville, begin with the site: where the wall would sit, what it needs to support, and whether the proposed work is near managed shoreline. Those answers help shape a practical plan for a space built to enjoy, not maintain.

    Call The Muscle Lawncare & Landscaping LLC at (270) 248-9790 or Request a Bid. Tell us what you want to change and what you know about the property. We’ll talk through the next steps with you, no pressure and no obligation.

    SEO & Publishing Notes

    1. SEO title: Retaining Walls on Kentucky Lake & Lake Barkley | The Muscle
    2. Meta description: Planning a retaining wall at Kentucky Lake or Lake Barkley? Learn how shoreline approvals, Western Kentucky soils, drainage, and freeze/thaw shape lakefront projects.
    3. Suggested URL slug: retaining-walls-kentucky-lake-lake-barkley
    4. Focus keyphrase: retaining walls on Kentucky Lake
    5. Supporting keyphrases: Lake Barkley retaining walls; lakefront retaining wall Western Kentucky; retaining wall drainage Kentucky; lake-home outdoor living
    6. Search intent: Local, high-intent research by lake-home owners planning retaining walls, terraces, or outdoor living improvements.
    7. Excerpt: A retaining wall near Kentucky Lake or Lake Barkley is shaped by more than the slope. Shoreline rules, clay soils, drainage, and freeze/thaw all belong in the plan.
    8. Open Graph title: Retaining Walls on Kentucky Lake and Lake Barkley
    9. Open Graph description: Understand what changes when your yard meets the water, from shoreline approvals to drainage and low-maintenance outdoor living.
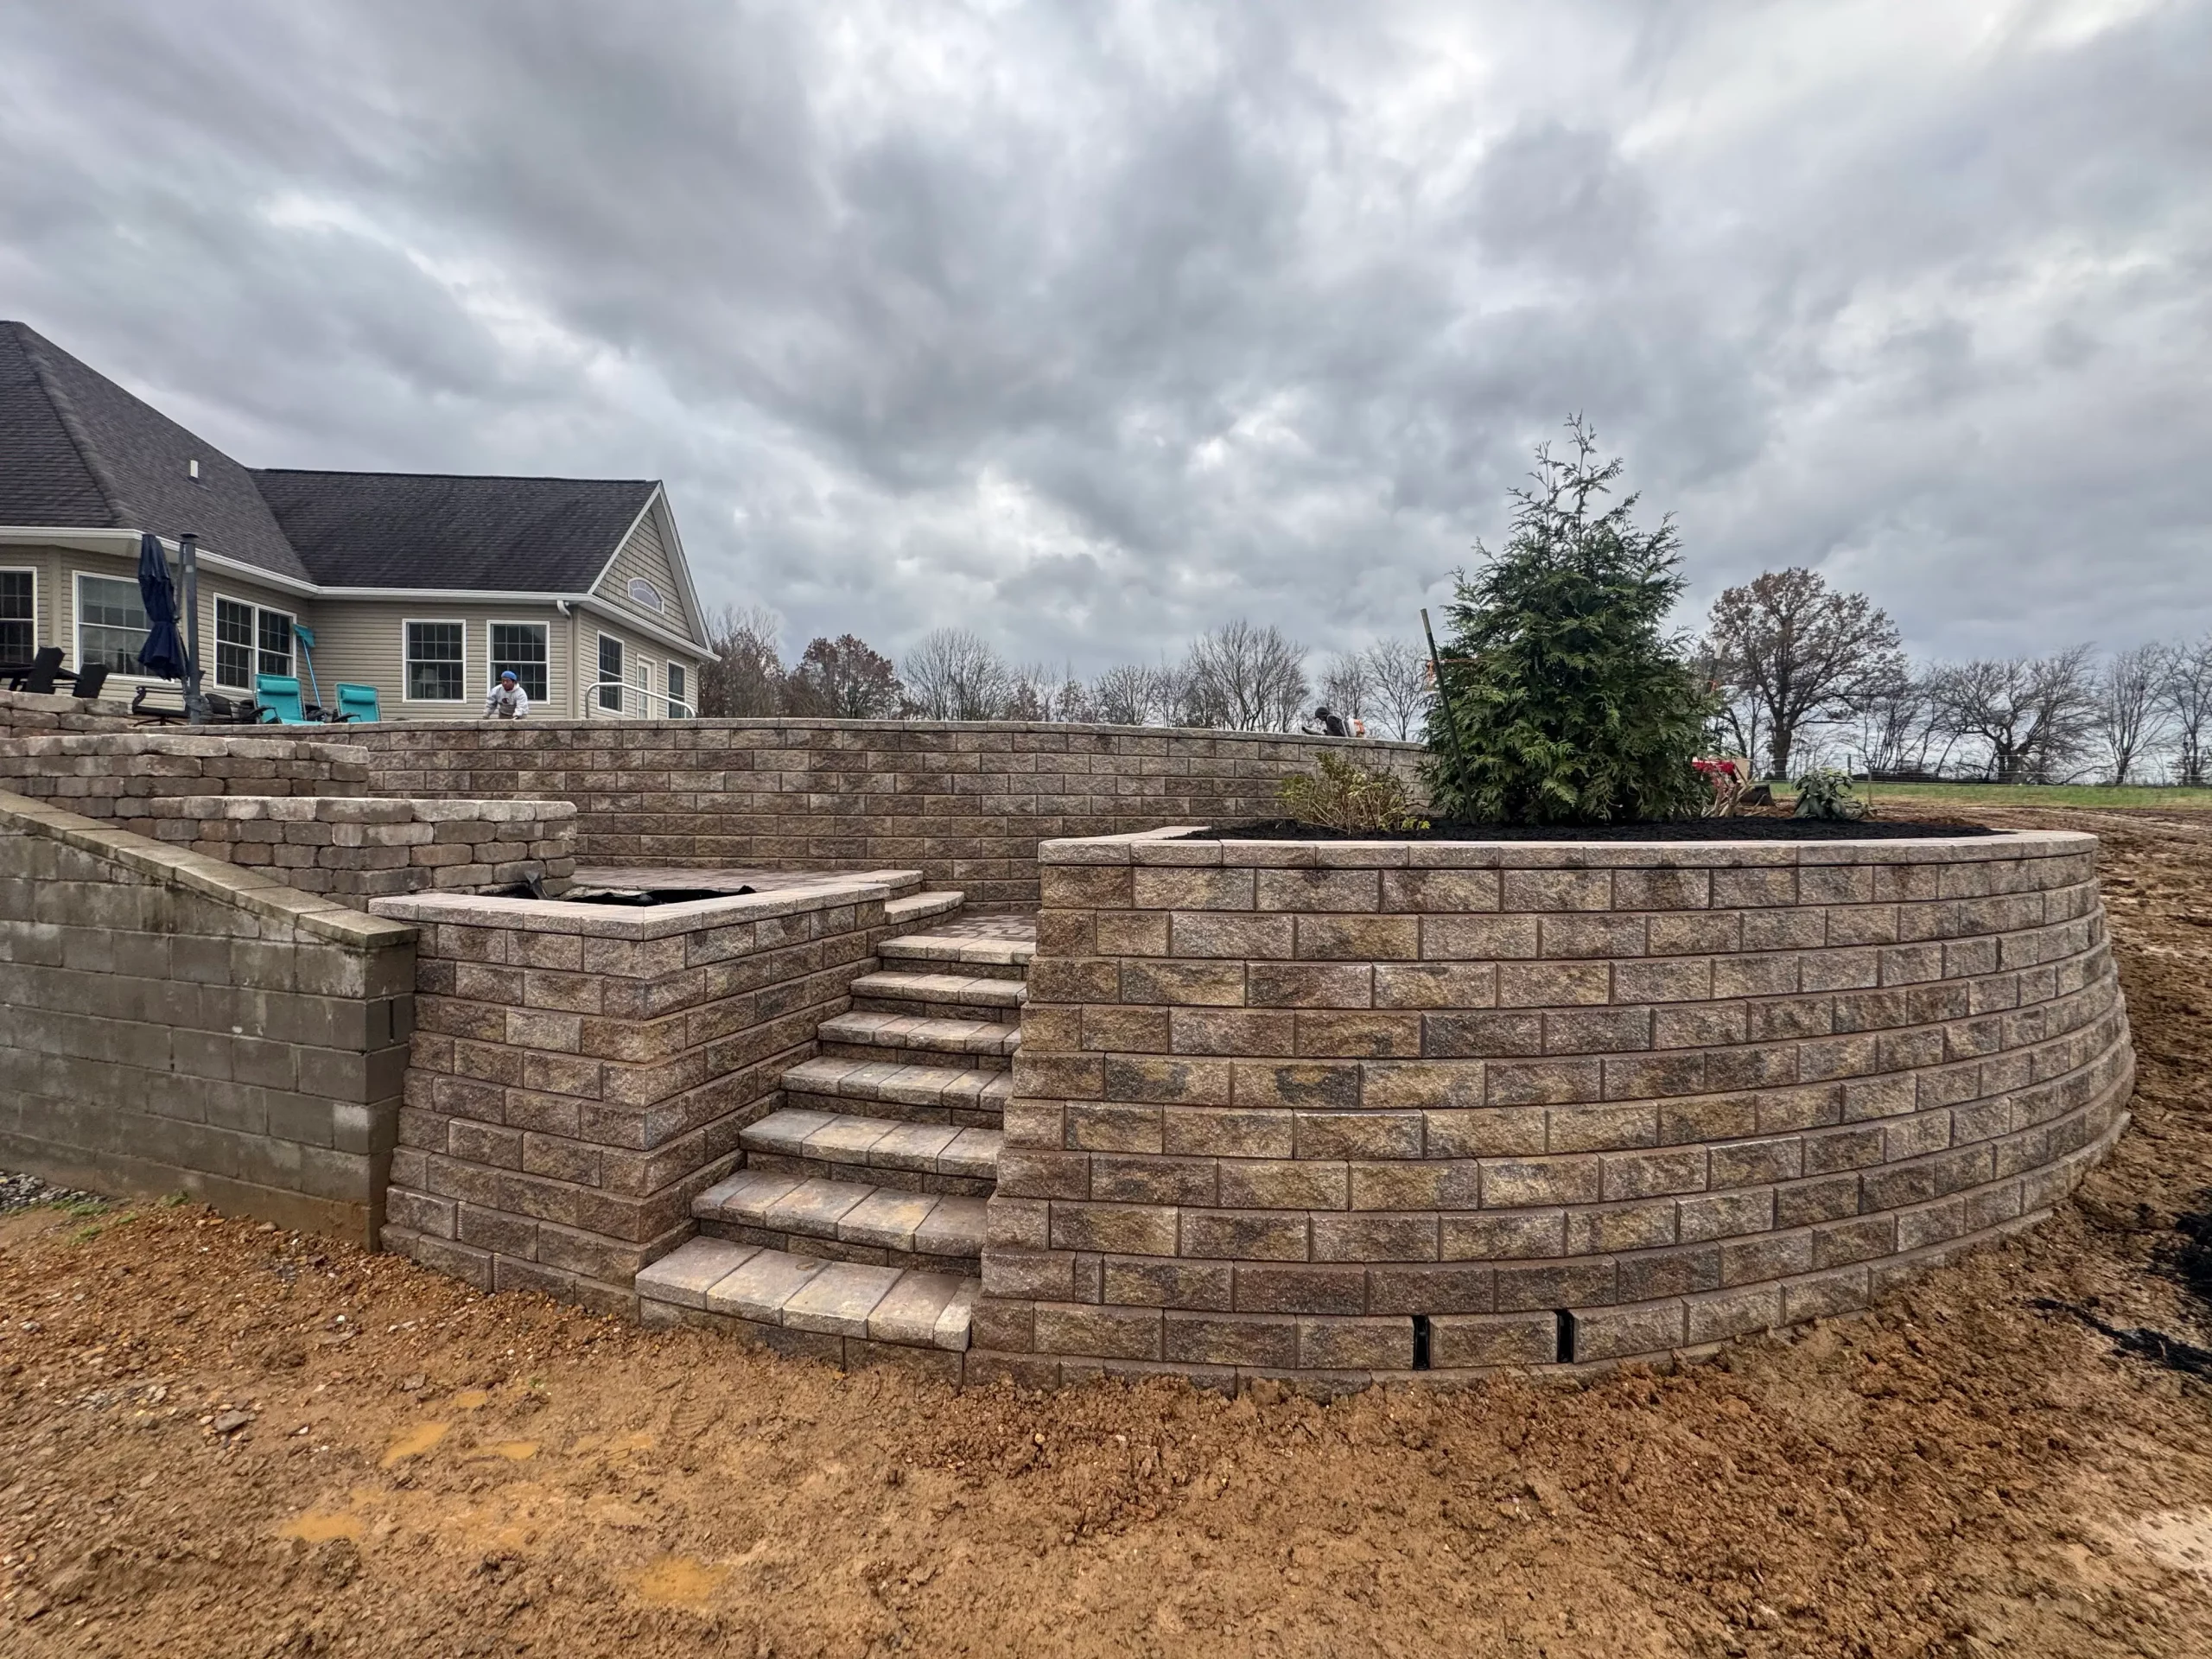
    10. Hero image: https://cdn.marblism.com/5vkDREmqvRB.jpg, Finished retaining wall with aligned capstones, integrated steps, and graded surroundings.
    11. Internal links: Retaining walls; hardscapes; Request a Bid; material guide; winter inspection guide.
    12. External references: TVA shoreline stabilization regulation; USACE Regional General Permit 25-RGP-01; TVA Kentucky Reservoir information.
    13. FAQ structured data:

    Editorial status: DRAFT for Tyler’s approval. Do not publish or schedule.

  • Commercial Snow Removal in Western Kentucky: What Property Managers Should Plan Before the First Storm

    Commercial Snow Removal in Western Kentucky: What Property Managers Should Plan Before the First Storm

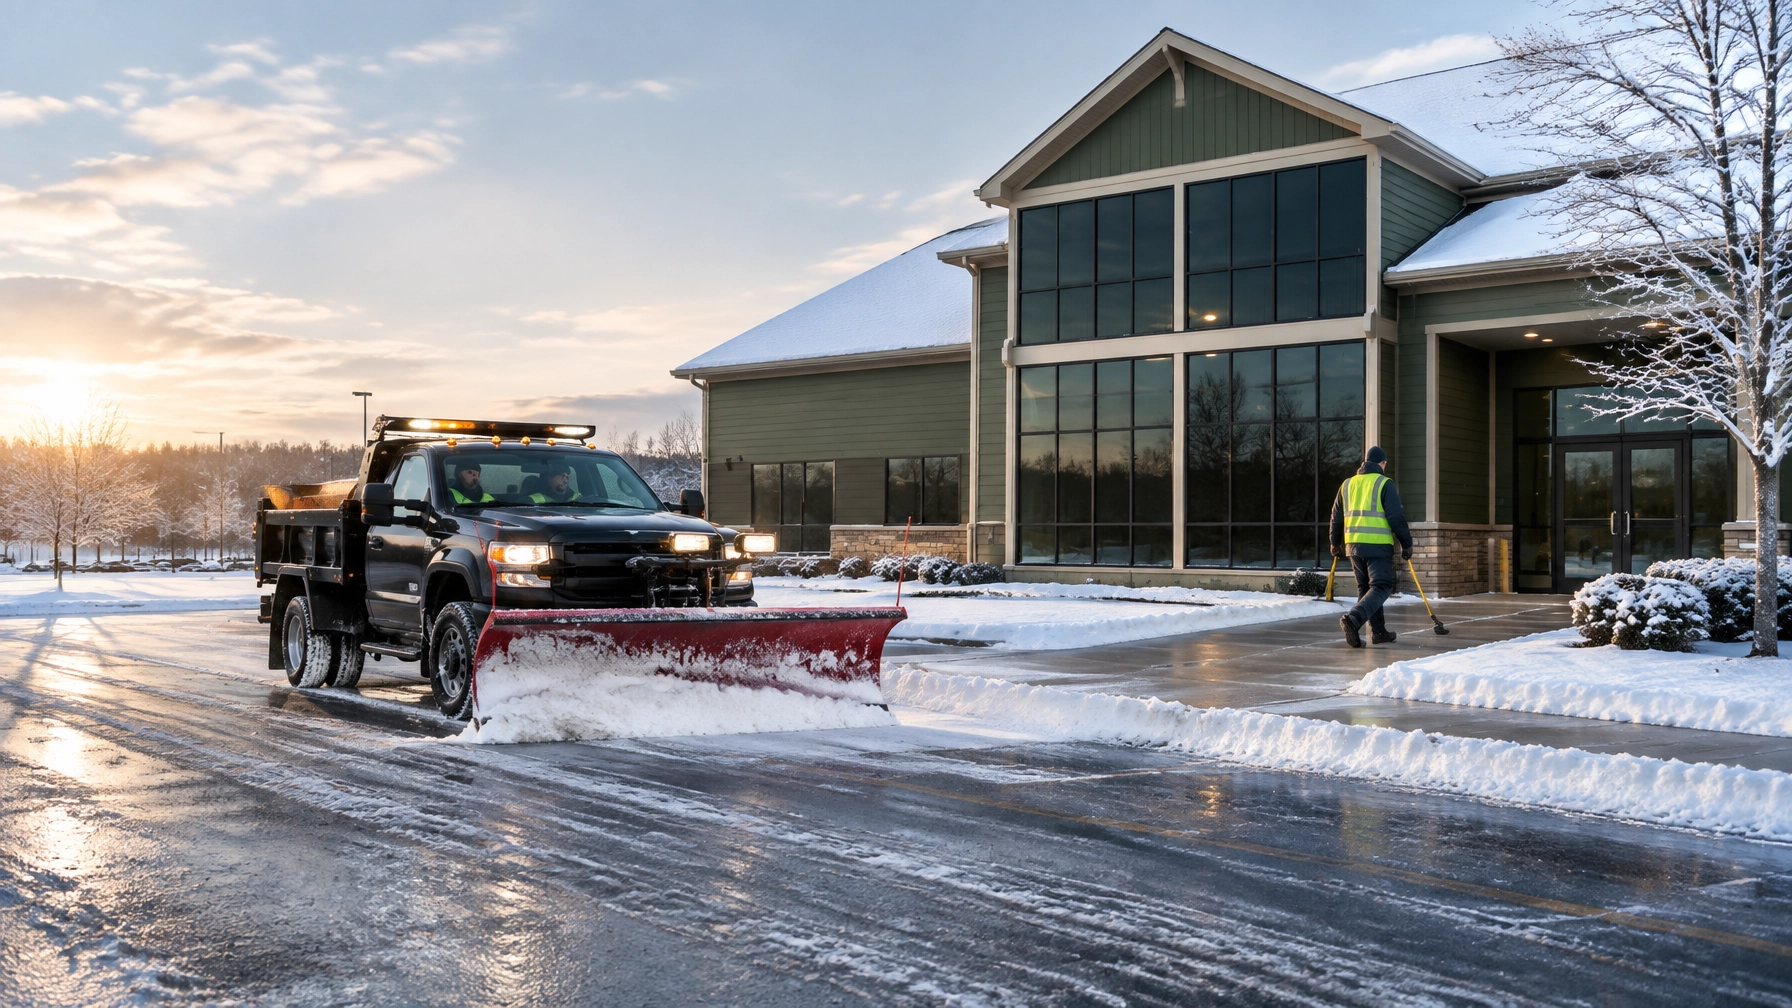
    AI-generated illustrative image; not a client project photo.

    Winter weather creates problems quickly. A blocked entrance affects customers. An untreated sidewalk creates a safety concern. A loading area buried under snow can interrupt deliveries, tenants, employees, and emergency access.

    For commercial property managers, snow removal should not be a last-minute phone call after the first flakes fall. It should be a defined operating plan built around your property, your traffic patterns, and the conditions common across Western Kentucky, Southern Illinois, and Northern Tennessee.

    The Muscle Landscaping provides commercial snow removal for businesses and commercial properties throughout the region. We focus on practical planning, clear communication, and honest upfront pricing without hidden add-ons.

    / Dept 01 : Start Before the Forecast

    Availability is easier to plan in fall than in a storm.

    A commercial snow removal contract is more than a name on a vendor list. It is an agreement about what gets cleared, when service is triggered, which areas receive priority, how updates are handled, and how billing works.

    Waiting until snow is already falling limits your options. The contractor must assess your site, understand your expectations, review access concerns, and determine whether the property fits the service route. That work is difficult to do properly while multiple properties are calling at once.

    Planning before winter gives you time to:

    1. Walk the property with the contractor.
    2. Identify priority areas and problem locations.
    3. Review snow and ice management options.
    4. Put a real number on the expected scope.
    5. Clarify exclusions before the first invoice.
    6. Establish one communication process for weather events.

    This applies whether you manage a retail center, office, church, multifamily property, medical facility, industrial site, or small commercial lot.

    / Dept 02 : Assess the Site Before Snow Covers It

    Good snow service starts with knowing the ground.

    A contractor cannot build a reliable plan from an address alone. Each property has different grades, pavement conditions, traffic patterns, drainage points, and obstacles.

    During a pre-season site assessment, review:

    1. Parking lots and drive lanes : Identify the routes that must remain open for customer, employee, tenant, and delivery traffic.
    2. Entrances and sidewalks : Mark primary doors, accessible routes, crosswalks, ramps, and areas where foot traffic concentrates.
    3. Loading areas and service access : Note delivery windows, dumpster access, loading docks, and lanes that cannot be blocked.
    4. Emergency access : Identify fire lanes, hydrants, emergency exits, and other areas that require special attention.
    5. Snow stacking locations : Decide where snow can be placed without blocking visibility, parking capacity, drainage, landscaping, or building access.
    6. Hidden obstacles : Mark curbs, islands, bollards, signs, wheel stops, utility covers, drainage structures, and other items that may disappear under snow.

    AI-generated illustrative image of a facility manager and snow contractor reviewing a commercial property before winter

    AI-generated illustrative image; not a client project photo.

    Western Kentucky properties also have to deal with wet snow, freezing rain, and repeated freeze/thaw cycles. Heavy clay soils can hold meltwater instead of allowing it to drain quickly. Low areas may refreeze overnight. Sites near lakes, low-lying ground, or sloped access roads may require additional attention to runoff and ice formation.

    That is why parking lot snow removal cannot be separated entirely from drainage and grade. If meltwater has nowhere to go, clearing the snow is only part of the problem.

    / Dept 03 : Define the Priority Order

    Clear access first. Make the property usable, not merely plowed.

    A commercial site rarely needs every square foot treated in the same way at the same time. Your contractor should understand how the property operates during and after a storm.

    A written priority sequence may include:

    1. Main entrances and accessible pedestrian routes.
    2. Primary drive lanes and parking lot entrances.
    3. Emergency access lanes and fire routes.
    4. Loading docks and delivery paths.
    5. High-traffic sidewalks and ramps.
    6. Secondary parking areas.
    7. Snow relocation or stacking areas.

    This does not mean every property follows the same order. A church, apartment community, office building, and retail center may all have different peak-use periods and access needs.

    If your business opens early, operates overnight, or has scheduled deliveries, those details belong in the plan. So do tenant requirements, special events, shift changes, and property management contacts.

    The goal is straightforward: your contractor should know what matters most before conditions become difficult.

    / Dept 04 : Put Triggers and Expectations in Writing

    Clear language prevents arguments when weather gets complicated.

    A snow removal contract should explain what activates service. That may involve a defined accumulation threshold, freezing conditions, sleet, freezing rain, or a specific request from the property manager. The correct trigger depends on the site and the level of risk you are willing to accept.

    Do not rely on vague wording such as “as needed” without further explanation. Ask the contractor to clarify:

    • What conditions qualify as a service event?
    • Is snow removal initiated automatically, by request, or through both methods?
    • Does ice management apply before snowfall, after plowing, or only when requested?
    • Are repeated visits included during a long storm?
    • What happens when temperatures cause meltwater to refreeze?
    • How are extraordinary events or unusually heavy accumulation handled?

    Response expectations should also be realistic. A professional commercial snow removal company should explain how weather monitoring, routing, site conditions, traffic, and storm severity affect service sequence. No responsible contractor should promise a fixed response time regardless of conditions.

    The better question is: What is the operating process, and how will we know what is happening?

    / Dept 05 : Define Ice Management Separately

    Snow can be moved. Ice requires a treatment plan.

    Commercial ice management may include deicing or anti-icing treatments where appropriate. It should never be treated as an automatic, unlimited add-on.

    Your proposal should identify:

    1. Whether deicing is included in the base scope.
    2. Which areas are prioritized, such as entrances, sidewalks, ramps, and loading zones.
    3. Whether materials are applied before a storm, after clearing, or during follow-up visits.
    4. Whether reapplication is included during extended freezing conditions.
    5. How material use is documented and billed.
    6. Any limitations caused by pavement type, temperature, drainage, or existing surface conditions.

    Material selection matters. Poor application can affect concrete, pavers, landscaping, metal surfaces, and drainage systems. Western Kentucky’s repeated freeze/thaw cycles make surface protection especially important.

    The right approach is controlled application based on the property and the weather: not spreading material everywhere without a defined purpose.

    / Dept 06 : Choose a Contractor Who Communicates

    Reliable winter property maintenance is a communication system.

    Snow operations involve changing conditions. Managers need to know who is monitoring the event, who can make scope decisions, and how updates will be delivered.

    Before signing, identify:

    • The primary property contact.
    • The contractor’s primary communication contact.
    • How weather-related updates will be sent.
    • Whether the contractor provides service summaries or completion notes.
    • How urgent access concerns are reported.
    • Who approves work outside the original scope.

    The Muscle approaches commercial snow removal with direct, practical communication. Our commercial service page outlines snow and ice management for properties in Western Kentucky, and each account is reviewed according to its actual requirements.

    Professional accountability also matters. Ask for current insurance documentation when required by your organization, confirm who will be responsible for the work, and make sure the crews assigned to the property understand the site plan and safe operating procedures.

    You are not just hiring someone with equipment. You are hiring a company to operate around your building, pavement, tenants, customers, landscaping, and business schedule.

    / Dept 07 : Demand Billing Clarity

    The cheapest-looking bid can become the most expensive one if the scope is vague.

    Commercial snow removal pricing depends on the property layout, service areas, storm triggers, visit frequency, ice-management requirements, and snow relocation needs. A responsible contractor should inspect the site and provide a scope that reflects those conditions.

    Your proposal should explain:

    1. What snow removal areas are included.
    2. What sidewalks, entrances, and loading areas are included.
    3. Whether deicing is included or billed separately.
    4. What triggers additional visits or material applications.
    5. Whether hauling or off-site snow relocation is excluded.
    6. How emergency requests are handled.
    7. Whether after-hours or special-event service changes the scope.
    8. How invoices identify completed work and additional services.

    At The Muscle, we believe in honest upfront pricing. You should understand what you are buying before winter begins. No hidden add-ons. No vague invoice surprises. If a property condition requires a separate service, it should be discussed clearly.

    / Dept 08 : Build the Plan Now

    The first storm should test the plan: not create it.

    If you are responsible for a commercial property in Murray, Paducah, Mayfield, Benton, Hopkinsville, Southern Illinois, Northern Tennessee, or surrounding communities, now is the time to request a commercial bid.

    The Muscle Landscaping can review your property, discuss access priorities, and put together a straightforward scope for commercial snow removal. Call (270) 248-9790 or request a commercial estimate online.

    For broader vendor and compliance information, review the Commercial Contractor Packet. You can also review our commercial snow removal service before starting the conversation.

    No pressure. No obligation. Just a clear discussion about what your property needs before the weather turns.

    SEO Package

    1. Primary Keyword

    Commercial snow removal

    2. Secondary Keywords

    • Commercial snow removal services near me
    • Commercial snow removal contracts
    • Snow removal for businesses
    • Parking lot snow removal
    • Commercial ice management
    • Snow removal company near me
    • Winter property maintenance
    • Snow and ice management

    3. Search Intent

    High-purchase-intent local commercial service search. The reader is a property manager, business owner, facility manager, or commercial decision-maker planning winter snow and ice service before the first storm.

    4. Target Geographic Market

    Western Kentucky, Southern Illinois, and Northern Tennessee, including Murray, Paducah, Mayfield, Benton, Hopkinsville, and surrounding service areas.

    5. SEO Title

    Commercial Snow Removal in Western Kentucky | Plan Before Winter

    6. Meta Description

    Planning commercial snow removal in Western Kentucky? Learn what property managers should define before winter, including triggers, site priorities, ice management, communication, and pricing.

    7. Recommended URL Slug

    /commercial-snow-removal-western-kentucky-property-managers/

    8. Full Article

    The full article appears above.

    9. Suggested Internal Links

    10. Suggested Photos and Project Images

    Use the following generated visuals as clearly labeled illustrative images only. Do not present them as client project photos:

    1. Hero: Commercial property after a winter storm with cleared parking lanes : AI-generated image
    2. Site assessment: Facility manager and contractor reviewing access routes : AI-generated image
    3. Parking lot operations: Commercial parking lot with designated snow stacking : AI-generated image
    4. Ice management: Commercial entrance and sidewalk receiving deicing treatment : AI-generated image

    11. Google Business Profile Post

    Commercial snow removal planning starts before the first storm.

    The Muscle Landscaping helps commercial property managers, retail centers, offices, churches, multifamily properties, and businesses plan for parking lot snow removal, entrances, sidewalks, loading areas, and commercial ice management across Western Kentucky, Southern Illinois, and Northern Tennessee.

    We focus on site-specific planning, clear communication, defined service triggers, and honest upfront pricing without hidden add-ons.

    Request a commercial snow removal bid before winter:
    https://www.themusclelandscaping.com/contact-us

    12. Facebook Post

    The first storm is the wrong time to build your commercial snow plan.

    Before winter, property managers should define parking lot priorities, entrances, sidewalks, loading areas, snow stacking locations, ice-management expectations, communication procedures, and billing terms.

    The Muscle Landscaping provides commercial snow removal planning and service across Western Kentucky, Southern Illinois, and Northern Tennessee.

    Request a straightforward commercial bid before the forecast turns:
    https://www.themusclelandscaping.com/contact-us

    13. Three Additional Related Blog Topics

    1. How Much Does Commercial Snow Removal Cost in Western Kentucky? What Affects Your Bid
    2. Commercial Ice Management in Kentucky: What Property Managers Should Put in the Contract
    3. Parking Lot Snow Removal Planning: How to Protect Access, Drainage, and Snow Storage Areas
  • How Much Does Concrete Curbing Cost in Western Kentucky? 2026 Per-Foot Pricing Guide

    How Much Does Concrete Curbing Cost in Western Kentucky? 2026 Per-Foot Pricing Guide

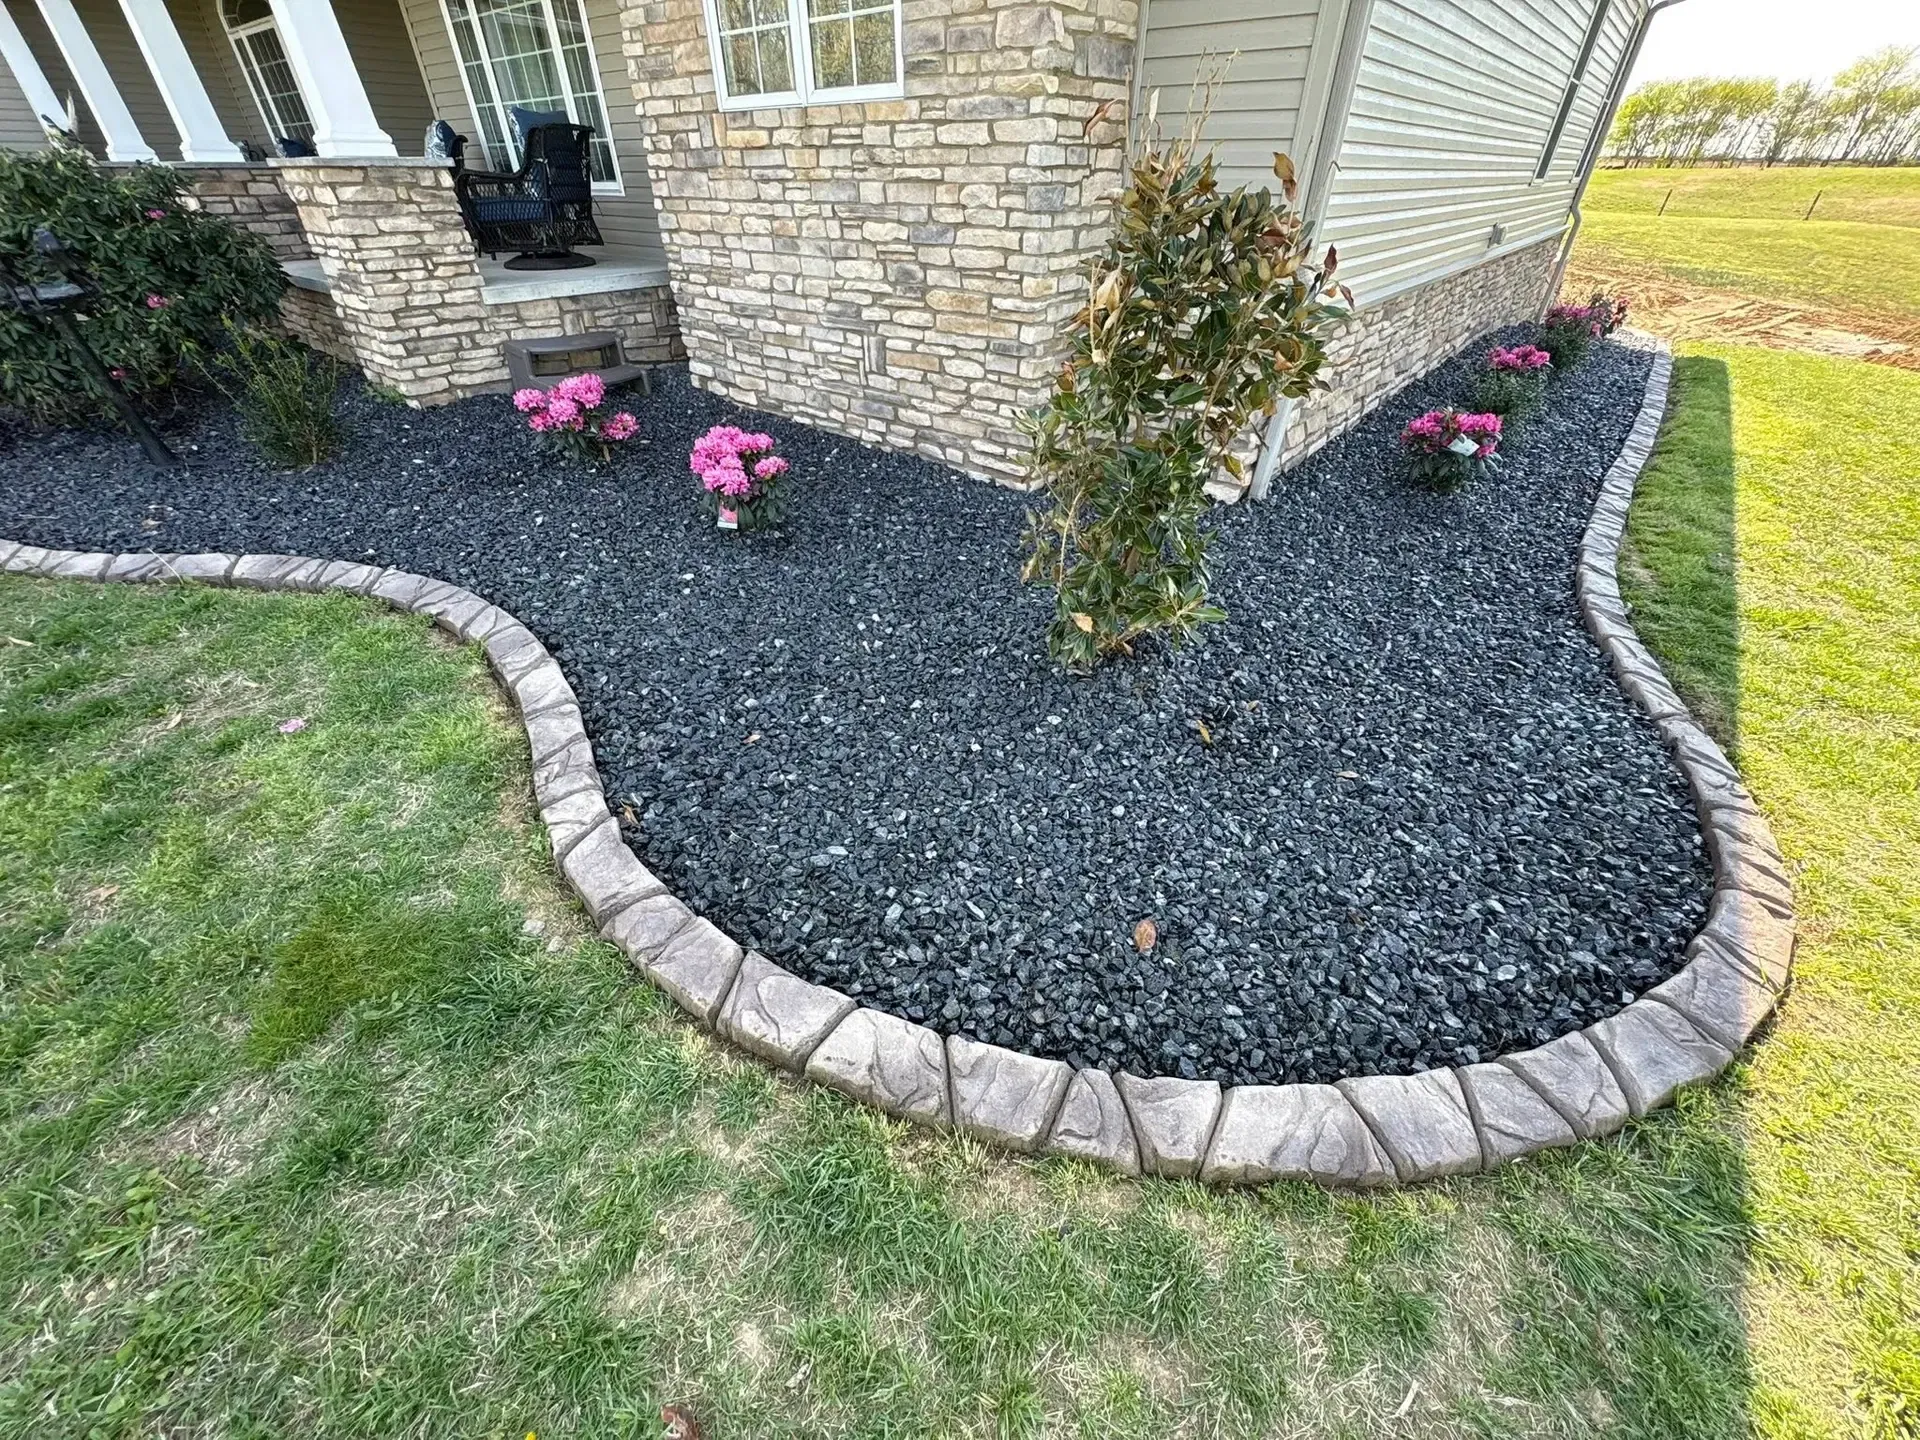
    A completed curbing installation shows how a clean, continuous edge can bring a landscape bed into sharper focus.

    If you are budgeting for professionally installed concrete curbing in Western Kentucky, Southern Illinois, or Northern Tennessee, plan on about $24–$38 per linear foot for premium, fiber-reinforced, hand-finished curbing in 2026. Custom colors, intricate designs, challenging access, or extra site work can push a project higher.

    For a straightforward 100-foot installation, that is roughly $2,400–$3,800. Use this as a planning range, not a site-specific quote. Your final number depends on the footage, ground conditions, design choices, and whether grading or drainage needs attention first.

    A much cheaper quote often describes a different product: thinner curbing, less preparation, fewer finish details, or some combination of the three. A low number is not a bargain if the border cracks, shifts, or needs replacing.

    At The Muscle, we measure the work and explain the scope before installation. The quote is the number, no hidden add-ons.

    / Dept 01: What the Price Covers

    Pay for a finished edge built for your property, not just concrete by the foot.

    Decorative concrete curbing is extruded on site as a continuous landscape border, then shaped and finished by hand. A complete installation may include layout, sod and root removal, trench preparation, concrete and fiber reinforcement, stamping, coloring, sealing, and cleanup.

    The finished edge can define planting beds, help keep mulch or decorative stone in place, and create a crisp transition between lawn and landscape. The right profile can also make mowing along a bed easier and reduce the need for string trimming.

    The full installation matters. In Western Kentucky, wet clay soils, heavy rain, and freeze/thaw cycles can put pressure on poorly prepared work. A tidy curb placed on top of loose sod is not the same job as one set into a properly prepared channel.

    Stamped concrete curbing follows a sweeping bed line around a home

    This finished stamped border traces a curved landscape bed and separates the planting area from the lawn.

    / Dept 02: What Moves the Number

    Footage sets the baseline. The site and finish determine the rest.

    1. Total linear footage: Longer runs often spread mobilization and setup across more footage. Short or broken-up runs can cost more per foot because layout and setup still take time.
    2. Ground preparation and grade: Uneven grades, soft spots, dense clay, and elevation changes may require more shaping and preparation.
    3. Sod, roots, and existing borders: Removing grass, established roots, old edging, or other obstructions takes additional labor. Tell the estimator what is already there.
    4. Profile and stamp: A simple slant profile is a different finish from a wood-grain or slate-style stamp. Some patterns and profiles take more care to form consistently.
    5. Color and antiquing: Standard color options differ from custom colors or multi-tone antiquing, which adds detail to the finished appearance.
    6. Curves and tight radii: Gentle curves are part of good landscape design. Tight turns and detailed shapes require careful layout and hand-finishing.
    7. Sealer: Ask whether sealer is included, what product or finish is proposed, and what maintenance it requires.
    8. Access and site conditions: Narrow access, obstacles, long material routes, and difficult staging can affect the work.
    9. Dirt work and drainage: If water is pooling or grade is directing runoff the wrong way, correct that first. A curb should not be used to trap water against a foundation or inside a bed.

    For a closer look at pattern, color, and finish options, see decorative concrete curbing styles, colors, and patterns. You can also review The Muscle’s concrete curbing service to see how the installation is laid out, prepared, extruded, and finished.

    / Dept 03: How Concrete Compares With Other Borders

    The right choice depends on how long you want the border to work, and what you want it to do.

    Border option Rough 2026 per-foot reality Trade-off
    Plastic or poly edging About $1–$4 per foot for DIY material; roughly $4–$12 installed Low upfront cost and easy to shape, but thinner products can lift, crack, or loosen and may need resetting or replacement.
    Standard steel edging About $2–$8 per foot for DIY material; roughly $8–$18 installed Creates a crisp line and can last longer than plastic, but costs more than basic poly and still depends on suitable installation and conditions.
    Timber border About $1.50–$7 per foot for DIY material; roughly $6–$14 installed A natural look, but soil contact and moisture can lead to rot, movement, or eventual replacement.
    DIY brick, stone, or block border Material cost varies substantially by product and whether you can reuse materials The purchase price is only part of the job: base preparation, leveling, cutting, hauling, and resetting take time and tools.
    Premium concrete curbing About $24–$38 per foot installed Higher initial investment for a continuous, custom-finished border, with cost affected by design and site preparation.

    These are broad consumer budgeting ranges, not local bids; material quality, installation scope, and site conditions vary. Published comparisons for landscape edging materials and costs and concrete, steel, and plastic edging provide additional background.

    Concrete is not automatically the right answer for every bed. Plastic may make sense for a small, temporary planting area. Steel can suit a clean, understated edge. Timber may fit a rustic design if you are comfortable maintaining or replacing it. Concrete is worth considering when you want a defined, decorative border that can also make edging and bed maintenance more manageable.

    For a fuller look at why homeowners move from temporary edging to concrete, read our related guide to concrete curbing quality and plastic edging.

    / Dept 04: The Maintenance Math

    Count the time and materials you are already spending to maintain tired borders.

    A clean mower-friendly edge can reduce string trimming along the beds. It may also help keep mulch and decorative stone from migrating into the lawn during heavy rain. That can mean less edging work, less raking, and fewer mower or trimmer bumps against a loose border.

    Here is a simple way to estimate your own time savings: minutes spent trimming each visit × visits per year ÷ 60 = annual hours spent trimming. For example, if trimming a particular border takes 10 minutes and you do it 25 times a year, that is just over four hours annually. Your actual time will depend on the length and shape of the beds and how you maintain them.

    Concrete curbing can improve curb appeal by making the landscape look more deliberate and finished. That can help a property make a stronger first impression, but no contractor can promise a specific resale increase. And while a well-built curb is intended to last longer than many temporary borders, no responsible installer should promise a fixed lifespan without accounting for installation, water, ground movement, and maintenance.

    Sealer also needs attention over time. Ask how to care for the chosen finish and when resealing may be appropriate.

    Curving stamped curbing creates a defined edge around a residential landscape bed

    A separate completed installation pairs a curved bed line with decorative stone and planting.

    / Dept 05: Check the Installation Before You Sign

    Ask direct questions. A professional should answer them plainly.

    1. What is in the mix? Ask whether the concrete is fiber-reinforced and what reinforcement is specified. Fiber helps control cracking; it does not make concrete immune to cracks.
    2. How will you prepare the ground? The crew should explain sod and root removal, trench preparation, and how the curb will be set at the planned elevation.
    3. How will you handle water? A continuous edge can affect runoff. Ask how the design avoids holding water against your home or creating a low spot in a bed.
    4. What about freeze/thaw and sealer? Ask how the selected mix, finish, curing, and sealer are suited to outdoor exposure, and what maintenance is expected.
    5. What does the workmanship warranty cover? Get the terms in writing. Ask what is covered, for how long, and what conditions are excluded.

    Also ask who will be present, whether the contractor carries insurance, and how the work is checked before the crew leaves. A written proposal should identify the footage, profile, stamp, color, preparation, sealer, cleanup, and any dirt work or drainage correction. That is how you compare complete scopes instead of vague totals.

    The Muscle’s team is insured and professionally trained, and we stay involved in the work. The Muscle is also a Unilock Authorized Contractor for applicable hardscape work. That credential relates to our hardscape installations; it is not a claim that Unilock certifies concrete curbing.

    / Dept 06: Local Conditions Matter

    Your landscape edge has to work with the ground around it.

    In Paducah, Mayfield, Murray, Benton, and Calvert City, the same curb design can require different preparation from one property to another. Western Kentucky clay can hold water. Heavy rain can expose drainage problems. Freeze/thaw cycles can move wet ground. A border that interrupts the natural flow of water may create a new problem instead of solving one.

    On properties near Kentucky Lake and Lake Barkley, slopes, access, runoff, and shoreline conditions deserve a closer look. Requirements vary by property and location, so ask what needs to be checked before work begins.

    When curbing is part of a larger outdoor project, consider the full layout, including planting beds, drainage, patios, and grade changes. Our Western Kentucky outdoor living cost guide covers how those elements can fit together.

    The Muscle serves homeowners and property owners across Western Kentucky, Southern Illinois, and Northwest and Middle Tennessee.

    / Next Step: Request a Bid

    Get a site-specific number without the sales pitch.

    If you are searching for concrete curbing near me, concrete curbing cost, or landscape curbing prices, start with a conversation about your property. We will review the layout, discuss the finish you want, and put a real number on the work. No pressure and no hidden add-ons.

    Request a Bid from The Muscle: the primary next step. You can also download the Contractor Packet for more about our company and process, or call (270) 248-9790.


    13-Item SEO Package

    1. Article title: How Much Does Concrete Curbing Cost in Western Kentucky? 2026 Per-Foot Pricing Guide
    2. SEO title: Concrete Curbing Cost in Western Kentucky: 2026 Pricing
    3. Suggested URL slug: how-much-does-concrete-curbing-cost-western-kentucky-2026
    4. Focus keyphrase: concrete curbing cost Western Kentucky
    5. Secondary keyphrases: concrete curbing near me; concrete curbing cost per linear foot; landscape curbing prices; concrete landscape edging cost; concrete curbing Paducah KY
    6. Meta description: See 2026 concrete curbing cost ranges for Western Kentucky, Southern Illinois, and Northern Tennessee, plus price factors, edging comparisons, and what to ask before hiring.
    7. Excerpt: Budget about $24–$38 per linear foot for premium concrete curbing in 2026. Learn what affects the price, how it compares with other borders, and what a sound installation includes.
    8. Search intent: Local, high-purchase-intent cost research and contractor consideration.
    9. Target locations: Paducah, Mayfield, Murray, Benton, Calvert City, Kentucky Lake, Lake Barkley, Southern Illinois, Northwest Tennessee, and Middle Tennessee.
    10. Internal links: Concrete curbing service page; curbing quality and plastic edging guide; decorative curbing styles, colors, and patterns; outdoor living cost guide; Contractor Packet.
    11. Hero image alt text: Finished decorative concrete curbing outlining a dark landscape-rock bed beside a home.
    12. Social title: What Does Concrete Curbing Cost in Western Kentucky in 2026?
    13. Primary conversion action: Request a Bid; secondary options are the Contractor Packet download and phone call at (270) 248-9790.
  • Cold-Weather Hardscape Installation: What Can Actually Be Built in Winter in Western Kentucky (and What Waits for Spring)

    Cold-Weather Hardscape Installation: What Can Actually Be Built in Winter in Western Kentucky (and What Waits for Spring)

    Winter does not automatically shut down hardscape installation in Western Kentucky.

    It does change the schedule, the sequence, and the conditions a responsible contractor will accept. Some work can move forward during a cold-weather window. Other work should wait until the ground is workable and temperatures are stable.

    That distinction matters.

    If you are searching for hardscaping contractors, paver installation near me, or patio installers near me, the right question is not simply, “Can you build in winter?”

    The better question is: What can be built correctly right now, and what should be scheduled for spring?

    The Muscle is booking winter work and early-spring slots across Western Kentucky, Southern Illinois, and Northern Tennessee. Call (270) 248-9790 for a site assessment and an honest answer.

    / Dept 01: Cold Weather Changes the Ground

    Temperature matters, but wet clay is usually the bigger problem.

    Air temperature is only one part of winter hardscape installation. Soil temperature, recent rainfall, ground saturation, and freeze-thaw conditions all affect whether a site is ready for excavation and compaction.

    Western Kentucky clay soils can hold water for a long time. When that clay is wet, it becomes soft, sticky, and difficult to compact. Heavy equipment can rut the site, and aggregate placed over unstable soil may not perform as intended.

    Frozen ground creates a different problem. Frozen soil can feel firm on top while remaining unsuitable beneath the surface. Once it thaws, the ground can soften and move. Compacting frozen soil or placing a base over it is not a shortcut to a stable installation.

    Freeze-thaw cycles create additional movement. Water beneath an unprepared surface freezes, expands, and pushes upward. When the ground thaws, the surface may settle unevenly. That is how patios, walkways, driveways, and walls begin to shift, sink, or separate.

    The goal is not to work through every condition. The goal is to work when the site can support the installation.

    / Dept 02: What Can Be Built This Winter

    Winter work is possible when the ground, drainage, and project sequence line up.

    Depending on site conditions, the following work may be completed during cold weather:

    1. Site evaluation and project planning
      We can review grades, drainage, access, soil conditions, existing walls, and how you plan to use the space.

    2. Design and material selection
      Winter is a practical time to choose pavers, wall systems, colors, patterns, caps, steps, and outdoor living features before spring demand increases.

    3. Excavation and grading
      Excavation, dirt work, and grading may proceed when the ground is not frozen or saturated. Unsuitable soil, roots, organic material, or unstable clay can be addressed when conditions allow.

    4. Aggregate base preparation
      A properly excavated and compacted base is the foundation of a durable hardscape. Aggregate should be installed in controlled lifts and compacted before the next layer is placed.

    5. Retaining wall construction
      Retaining wall work may continue through suitable winter windows when excavation, base preparation, drainage stone, backfill, and reinforcement can be installed correctly.

    6. Drainage correction
      Winter can be a smart time to address grading problems, standing water, downspout discharge, French drains, catch basins, or other drainage concerns before spring rain and snowmelt test the property.

    7. Land clearing on suitable sites
      Clearing and access work can sometimes be completed while vegetation is dormant, provided the site can support equipment without unnecessary damage or rutting.

    8. Spring project scheduling
      Even when final installation must wait, design, material ordering, site preparation, and scheduling can happen now.

    The Muscle crew installing a hardscape foundation with geotextile fabric and aggregate base

    / Dept 03: What May Need to Wait

    Honest scheduling protects the work and your investment.

    Not every hardscape installation should be completed in winter. A responsible contractor should pause when conditions prevent proper construction.

    Final paver installation may need to wait if the subgrade is frozen, the clay is saturated, or the base cannot be compacted consistently. Jointing materials and finishing details also require appropriate conditions. The same applies to any work that depends on stable ground, clean edges, reliable drainage, or proper curing.

    A winter project may be completed in phases:

    • Evaluate and design the project now.
    • Complete excavation or drainage correction during a workable window.
    • Prepare and compact the base when the ground is suitable.
    • Pause if conditions deteriorate.
    • Finish pavers, caps, steps, or other details when the spring installation window opens.

    That is not a failure of planning. It is quality control.

    The wrong contractor forces the calendar. The right contractor works with the site.

    / Dept 04: The Base Is the Difference

    Pavers do not fail because winter exists. They fail when water and movement are ignored.

    A hardscape system needs more than attractive surface material. It needs a prepared foundation that can handle moisture, loading, and seasonal movement.

    A cold-weather installation should account for:

    1. Excavation depth
      The excavation must remove organic material and unstable soil. Depth depends on the surface, expected loads, soil conditions, drainage, and frost exposure. Where required, the excavation and base must extend below the frost line.

    2. Geotextile separation
      In Western Kentucky clay, fabric may be used to separate the soil from the aggregate base and reduce migration of clay into the stone.

    3. Compacted aggregate in lifts
      Base material should be placed in controlled layers and compacted before additional material is added. One thick, loose layer is not the same as a properly compacted base.

    4. Positive drainage
      Water needs a planned route away from the home and out of the hardscape system. Surface slope, underdrains, clean drainage stone, channel drains, French drains, and safe outlets may all be part of the solution.

    5. Edge restraint
      Proper edge restraint helps keep pavers from spreading or separating under regular use and seasonal movement.

    6. Materials suited to the site
      The paver, wall system, jointing material, and base design should match the intended use and local conditions.

    For more on winter movement and surface durability, read our guide to paver driveways versus poured concrete in Western Kentucky.

    / Dept 05: Retaining Walls Need Water Control

    The visible wall is only one part of the structure.

    A retaining wall on a slope, beside a patio, or near a driveway has to manage soil pressure and water. Western Kentucky clay can hold moisture behind a wall, increasing pressure during wet periods and freeze-thaw cycles.

    A proper wall installation may include:

    • An excavated and compacted foundation
    • A stable aggregate base
    • Correct wall setback and alignment
    • Clean drainage stone behind the wall
    • A drainpipe and suitable discharge route
    • Reinforcement where the height, slope, soil, or loads require it
    • Final grading that directs water away from the wall

    Material selection should follow the site requirements. Our retaining wall material guide explains how block, natural stone, and timber compare for slopes, drainage, lake properties, and outdoor living areas.

    If your wall is already leaning, bulging, separating, or showing signs of erosion, winter is a good time to request an evaluation rather than adding soil or landscaping over the problem.

    Retaining wall construction showing drainage stone, wall blocks, and prepared base

    Retaining wall installation in progress with grading, compacted base, and equipment on site

    Wide retaining wall construction view showing leveled aggregate base and block installation

    / Dept 06: Lakefront Properties Require More Planning

    Kentucky Lake and Lake Barkley properties often combine steep grades, limited access, and serious drainage demands.

    A lakefront patio, walkway, or retaining wall cannot be planned from a material sample alone. The design may need to account for slope, runoff, shoreline exposure, changing grades, access for equipment, erosion, and how water moves across the property.

    Winter planning gives you time to evaluate the complete site before spring construction begins. That can be especially valuable when the project involves a raised patio, terraced yard, retaining wall, or outdoor living area near Kentucky Lake or Lake Barkley.

    Our drainage solutions guide explains why grading, downspouts, catch basins, French drains, and safe outlets should be considered together, not as separate fixes after the hardscape is installed.

    / Dept 07: Why Start Now?

    Spring is when many homeowners begin calling. Winter is when you can get ahead of the rush.

    Starting the conversation now can help you:

    • Get an earlier site assessment
    • Compare materials before peak-season decisions
    • Identify drainage or grading work before spring runoff
    • Complete suitable preparation during winter weather windows
    • Order materials and plan the installation sequence
    • Reserve an early-spring slot before the schedule fills

    The Muscle is a Unilock Authorized Contractor. For your project, that means access to Unilock materials and manufacturer-backed support, subject to the applicable product and installation requirements. It gives you another layer of confidence when selecting a paver or wall system for your property.

    Our team stays involved from the initial site review through the installation. We are insured, professionally trained, and accountable for the workmanship behind the finished project.

    The Muscle provides a 2-year workmanship warranty covering our installation workmanship. It does not cover failures caused by others’ construction, missing or blocked drainage, roots, or structural changes made after our work.

    Finished winter-season hardscape project with paver patio, retaining wall, and outdoor fire feature

    Finished hardscape installation with paver walkway, patio steps, and segmental retaining walls

    / Next Step: Find Out What Your Site Can Support

    You do not have to wait until spring to start moving forward.

    Call (270) 248-9790 and ask us to assess your project. We will explain what can reasonably be completed this winter, what should wait for a better installation window, and how to get on the winter or early-spring schedule.

    No pressure. No obligation. Just a straightforward conversation about your space, your goals, and the right way to build it.

    You can also visit The Muscle Landscaping to request an assessment.

  • Retaining Wall Inspection Before Winter: What Freeze-Thaw Does to a Wall (and What to Check Now)

    Retaining Wall Inspection Before Winter: What Freeze-Thaw Does to a Wall (and What to Check Now)

    A retaining wall does not need to collapse before it becomes a problem.

    If your wall is leaning, bulging, holding water, or showing movement at the top course, winter may push it further. In Western Kentucky, fall rain, wet clay soils, and repeated freeze-thaw cycles can turn a minor-looking issue into a major retaining wall repair by spring.

    The smart move is simple: inspect it now.

    You can check the visible warning signs yourself in a few minutes. If something looks wrong, call a professional before digging, prying, or trying to reset blocks on your own.

    / Dept 01: Why Winter Changes the Risk

    Water behind the wall is the problem. Freeze-thaw gives it leverage.

    Water gets into the soil behind the wall, the joints between units, and small openings around caps or drainage outlets. When temperatures drop, that water freezes and expands. When it thaws, it leaves loosened soil and small voids behind.

    Then the cycle repeats.

    Each freeze can push the wall slightly. Each thaw can leave the soil settled in a new position. Over time, the wall may lean, bulge, rotate, or separate.

    Western Kentucky clay adds another concern. Clay soil holds water and drains slowly. When it becomes saturated, it can swell and create more pressure behind the wall. A wall that appears stable during a dry October may be under much more stress after weeks of rain and freezing nights.

    Spring is often when stressed walls finally let go.

    What looks minor in October can become a rebuild by March.

    Retaining wall construction with drainage materials, compacted aggregate, and crew installation work

    Retaining wall installation showing geogrid reinforcement, drainage gravel, and active crew work

    / Dept 02: Warning Signs to Check Now

    Do not judge a wall only by whether it is still standing.

    Walk the full length of the wall from ground level. Look for changes in alignment, drainage, and the relationship between the wall and the surrounding soil.

    Watch for:

    1. Leaning, bulging, or rotating sections
      Sight down the wall from each end. A wall that no longer follows a straight line may be moving. Pay special attention to visible bulges where the wall is tallest.

    2. Water pooling at the base or in front of the wall
      Standing water near the toe of the wall can indicate poor drainage, a blocked outlet, or a low area that is keeping the base saturated.

    3. Cracked, loose, or shifted capstones
      Caps that are cracked, tilted, or separating from the course below may be responding to movement in the wall, not just surface wear.

    4. Movement at the top course
      Look for gaps, uneven lines, or sections that appear pushed outward. Movement at the top can be an early sign of pressure behind the wall.

    5. Soil washing out from behind the wall
      Check for channels, exposed drainage stone, disappearing soil, or small voids along the upper edge. Water may be moving through the wall where it should be controlled.

    6. Gaps opening between units
      New or widening spaces between blocks, stones, or masonry joints deserve attention.

    7. Efflorescence or staining
      White mineral deposits, dark staining, or persistent damp areas can show that water is moving through or remaining behind the wall.

    8. Sinking or settling sections
      A low spot in the cap course, a step that has dropped, or a section that no longer looks level may point to movement in the base.

    9. A visible bulge at the tallest point
      This is one of the clearest signs that lateral soil pressure is concentrating in a weak area.

    Do not assume a clean-looking wall is structurally sound. Most of the important work is behind the face, where you cannot see the base, drainage stone, pipe, or reinforcement.

    Retaining wall under construction with visible aggregate base preparation and first courses of block

    Retaining wall installation in progress with grading equipment, drainage backfill, and stepped wall sections

    / Dept 03: The Safe Homeowner Check

    Inspect what you can see. Do not disturb what is holding the slope together.

    You can safely inspect your wall from the ground without special equipment.

    1. Stand back and look down the wall line from both ends. Check for lean, rotation, or a belly in the face.
    2. Look across the capstones for uneven sections, loose pieces, cracks, or new gaps.
    3. Check the ground in front of the wall for ponding water, soft areas, erosion, or washout.
    4. Look behind the wall where accessible. Note soggy clay, exposed pipe, soil loss, or water flowing toward the wall.
    5. Inspect the bottom course for gaps beneath blocks, undermined soil, or signs that the base has shifted.
    6. Take photos from the same positions you can use later to compare movement.

    That is where the homeowner inspection should stop.

    Do not start digging behind the wall. Do not pry blocks out to see what is underneath. Do not pull out drainage material or excavate at the base without understanding how the wall is supported.

    Those actions can remove the soil or aggregate that is currently helping hold the wall in place. They can accelerate failure.

    If you see significant movement, keep people, vehicles, and heavy materials away from the top of the wall until it can be evaluated.

    / Dept 04: What Proper Retaining Wall Repair Involves

    The visible block is only one part of a retaining wall installation.

    A proper repair or rebuild begins by identifying why the wall moved. The contractor needs to evaluate the base, drainage, soil, wall height, slope above the wall, nearby loads, and any changes made since the original construction.

    Depending on the failure, the work may involve:

    1. Excavating past the failure zone
      Loose, wet, undermined, or unsuitable material may need to be removed before rebuilding begins.

    2. Preparing and compacting the aggregate base
      The first course needs a stable, properly leveled foundation. Loose stone placed over soft clay is not enough.

    3. Installing drainage stone behind the wall
      Clean, free-draining aggregate gives water a path that wet clay cannot provide.

    4. Installing perforated drain pipe
      A properly placed pipe can collect water behind the wall and direct it to an appropriate outlet.

    5. Adding geogrid reinforcement where site conditions require it
      Geogrid may be necessary when the wall is taller, the slope is steep, the soil is weak, or a driveway, patio, structure, or other load is near the top.

    6. Restoring correct batter and setback
      The wall must be rebuilt with the correct backward lean and alignment for the selected system.

    7. Rebuilding the cap course and finishing transitions
      Caps, steps, grades, patios, and planting areas must be tied back into the wall without sending water toward it.

    Most failed walls did not fail because of the block. They failed because of what was not done behind the block: inadequate excavation, poor compaction, missing drainage, incorrect backfill, or insufficient reinforcement.

    Retaining wall construction showing drainage gravel and active installation around a prepared site

    Finished retaining wall build with aligned capstones, integrated steps, and large-scale site grading

    Retaining wall installation around a concrete pad with clean drainage gravel backfill and precise block alignment

    / Dept 05: Repair or Rebuild?

    Patching a structurally failed wall is money wasted.

    A repair may make sense when the problem is localized and the wall itself remains stable. Examples can include:

    • A limited capstone issue
    • A small area of surface damage
    • A localized section of shifted material
    • A drainage outlet that is blocked or poorly directed
    • Minor erosion that has not undermined the base

    A rebuild is usually the more honest answer when:

    • The wall has rotated or visibly tipped
    • The base has settled or washed out
    • Multiple courses are moving
    • The wall is bulging through a large section
    • The drainage system is missing or has failed
    • The reinforcement has failed or cannot be verified
    • The wall is carrying a slope, driveway, patio, deck, or other significant load

    A contractor who simply resets the face without correcting the cause may give you a cleaner-looking wall for a short time. That is not the same as correcting the failure.

    For larger or heavily loaded walls, the project may also require an engineered solution. Our engineered retaining wall solutions guide explains why soil, drainage, height, and surcharge loads matter.

    / Dept 06: Lakefront Walls Need a Closer Look

    Water movement is not limited to the ground directly behind the wall.

    Properties near Kentucky Lake and Lake Barkley often have steep grades, changing drainage patterns, difficult access, and slopes that carry water toward the shoreline or lower parts of the property.

    If your retaining wall supports a lake-facing patio, steps, driveway, or terrace, inspect it with the entire slope in mind. Look for erosion above and below the wall, concentrated runoff, soft soil, and drainage that has changed since the wall was installed.

    A lakefront wall showing movement deserves a professional inspection sooner rather than later.

    For background on how material choice affects drainage, slope performance, and freeze-thaw conditions, read our retaining wall material guide.

    / Dept 07: Why Winter Is a Good Time to Call

    Walls do not fix themselves while the ground is frozen.

    Getting a wall inspected in fall or early winter gives you more options. You may be able to correct drainage, plan a repair, schedule a rebuild, or address an unsafe area before spring runoff exposes the problem.

    Waiting until a section collapses usually means more excavation, more cleanup, and a more disruptive project.

    The Muscle is a Unilock Authorized Contractor. For you, that means access to Unilock materials and manufacturer-backed support when the selected system fits your project. Our team stays involved during the work, and we carry insurance and professional training relevant to hardscape installation.

    We also provide a 2-year workmanship warranty. It covers our installation workmanship. It does not cover failures caused by others’ construction, missing or blocked drainage, roots, or structural changes made after our work.

    If you are comparing retaining wall contractors near you, ask how each contractor handles the work below grade, not just the finished appearance.

    Call Before the Wall Moves Further

    If you see leaning, bulging, pooling water, shifted caps, soil loss, gaps, or settling, call The Muscle for a retaining wall inspection.

    We serve homeowners and property owners across Western Kentucky, including Paducah, Murray, Benton, Calvert City, Kentucky Lake, Lake Barkley, and surrounding communities.

    Call The Muscle at (270) 248-9790 or visit themusclelandscaping.com.

    Tell us what you are seeing. We will look at the wall, explain what may be happening, and discuss whether it needs maintenance, retaining wall repair, or a full rebuild.

    Zero obligation. No pressure. Just a straightforward conversation before winter makes the decision for you.

  • How to Choose the Best Retaining Wall Material for Your Slope (Block, Stone, and Timber Compared)

    How to Choose the Best Retaining Wall Material for Your Slope (Block, Stone, and Timber Compared)

    Completed multi-level segmental retaining wall with integrated steps on a sloped residential property

    A retaining wall is not just a decorative border. It holds back soil, redirects water, manages elevation, and often supports the parts of your property you use every day.

    That is why the best retaining wall material depends on more than color or appearance. Your slope, soil, drainage, wall height, nearby structures, and long-term goals all matter.

    In Western Kentucky, Southern Illinois, and Northern Tennessee, retaining wall construction also has to account for clay soils, wet conditions, freeze/thaw cycling, and properties built on steep lakefront grades. A wall that looks good on installation day can still fail if the material and structure do not match the site.

    Here is the honest comparison between segmental concrete block, natural stone, and timber.

    / Dept 01: Start With the Load

    The taller the wall and the more it supports, the less room there is for guesswork.

    A low garden wall holding a small planting bed is a different project from a wall supporting a driveway, patio, home addition, or steep hillside.

    Before choosing material, a retaining wall contractor should evaluate:

    1. Wall height and total grade change: A taller wall creates more pressure at the base and may require reinforcement.
    2. Soil type: Western Kentucky clay holds water and can swell when wet, increasing pressure behind the wall.
    3. Water movement: Surface runoff, groundwater, downspouts, and hillside drainage all need a controlled path.
    4. Loads above the wall: Driveways, buildings, decks, pools, and heavy equipment add pressure to the slope.
    5. Available space: Some systems require room behind the wall for drainage stone and geogrid reinforcement.
    6. How the space will be used. A wall supporting a usable patio or outdoor living area must be treated as part of the overall structure.

    The face material is only the visible part. The base, drainage, backfill, compaction, and reinforcement are what make the wall dependable.

    The Muscle crew installing a segmental retaining wall with equipment and prepared base material

    The Muscle crew building a retaining wall with visible geogrid reinforcement and drainage stone during structural prep

    / Material 01: Segmental Concrete Block

    For most structural slopes in our region, engineered block offers the strongest combination of capacity, flexibility, repairability, and finish options.

    Segmental retaining wall block is installed without mortar. Individual units lock together through their shape, weight, setback, and connection system. Depending on the wall design, geogrid can extend back into the slope to reinforce the soil mass behind the wall.

    That makes segmental block a practical choice for:

    • Real grade changes
    • Terraced slopes
    • Raised patios
    • Walls near driveways
    • Walls supporting landscape or outdoor living areas
    • Larger installations requiring a coordinated design

    The dry-stacked construction also gives the system some flexibility during freeze/thaw movement. Instead of relying on a rigid mortar joint, the wall uses interlocking units and proper batter to manage minor movement.

    That does not mean block can be installed casually. A block wall still needs an excavated and compacted base, clean drainage stone, a perforated drain pipe, correct setback, and proper reinforcement when site conditions require it.

    Strengths of Segmental Block

    • Works with engineered geogrid reinforcement
    • Available in multiple colors, textures, and profiles
    • Handles curves, corners, steps, and terracing
    • Individual units can usually be replaced more easily than a poured or mortared structure
    • Pairs naturally with paver patios, outdoor kitchens, steps, and fire features
    • Provides a consistent, finished appearance

    What Homeowners Should Watch

    A wall can be made from quality block and still fail if the installer builds directly on loose soil, skips compaction, uses clay as backfill, or gives water nowhere to go.

    The material is not a substitute for installation discipline.

    Segmental block retaining wall construction with steps, terraces, and workers completing the installation

    / Material 02: Natural Stone

    Natural stone works best when the look is important and the wall is designed around the stone’s structural limits.

    Natural stone can create a more organic, irregular appearance than manufactured block. It blends well with wooded properties, lake homes, native plantings, and landscapes where a formal block pattern would feel too rigid.

    For retaining walls, dry-stacked stone is generally more forgiving than a rigid mortared wall in a freeze/thaw climate. Properly fitted stones can accommodate some movement while allowing water to move through the wall system.

    Natural stone makes sense for:

    1. Low garden walls
    2. Short landscape terraces
    3. Rustic or natural-looking properties
    4. Walls where stone is already part of the surrounding landscape
    5. Projects where skilled fitting and a less uniform appearance are desired

    The tradeoff is that natural stone is less standardized. Each piece varies in size, shape, and bearing surface. Building a stable wall requires careful stone selection, adequate base preparation, proper batter, and disciplined placement.

    For a taller wall, a steep slope, or a wall carrying a surcharge, natural stone may require a more involved structural approach. The decision should be made after looking at the entire site, not from a material sample alone.

    / Material 03: Timber

    Timber has a place, but wet Western Kentucky clay is not an easy environment for wood retaining walls.

    Timber can work for a small, low, non-critical garden wall where the homeowner accepts more maintenance and a shorter service life. It can also fit a rustic property where the wall is mainly decorative and future replacement is part of the plan.

    The problem is moisture.

    Clay soil holds water. Timber placed near consistently damp soil is exposed to rot, swelling, shrinking, and decay. Freeze/thaw cycles can open joints and shift sections. Once the structural timbers begin to fail, the wall usually cannot be repaired one piece at a time. The practical answer is often a full rebuild.

    Timber may make sense when:

    • The wall is low
    • There is excellent drainage
    • Nothing important depends on the wall
    • The appearance fits the property
    • The owner accepts eventual replacement

    Timber is a poor choice when the wall supports a driveway, structure, major patio, steep slope, or valuable lakefront grade. In those situations, a longer-term masonry system is usually worth serious consideration.

    / Dept 02: The Engineering Behind the Face

    Good retaining wall installation is mostly work you will never see after the project is finished.

    Regardless of material, a professional installation should address the following:

    1. Excavation and base preparation
      Native clay, organic material, and unstable soil must be removed as needed. The foundation area is shaped and compacted before the first course is installed.

    2. Compacted base
      The base must be level, stable, and capable of carrying the wall without settling. Loose stone placed without proper compaction is not a dependable foundation.

    3. Drainage stone
      Clean, angular drainage stone behind the wall gives water a path that compacted clay does not.

    4. Perforated drain pipe
      A perforated pipe near the base of the drainage zone collects water and directs it to an appropriate outlet. Water should not be allowed to build pressure behind the wall.

    5. Geogrid in lifts
      Where the wall height, slope, soil, or surcharge requires it, geogrid is installed in horizontal lifts and extended back into the slope. It reinforces the soil mass rather than relying on the face alone.

    6. Batter and setback
      A slight lean into the slope improves stability. Setback also affects how the wall meets patios, steps, planting areas, and upper grades.

    7. Cap course and finishing detail
      The cap course protects the wall’s top edge and creates a finished line. Proper overhang, alignment, adhesive where required, and clean transitions matter both visually and structurally.

    Retaining wall installation in progress with workers, drainage materials, and prepared aggregate base

    Overhead retaining wall construction progress showing leveled aggregate base and first courses of block installation

    Finished retaining wall project with curved steps, walkway transitions, and integrated hardscape detailing

    / Dept 03: Choose by Situation

    The right material becomes clearer when you start with the job your wall must perform.

    Low Garden Wall

    For a low decorative wall, natural stone or segmental block can both work. Choose natural stone for an organic appearance. Choose block for cleaner lines, easier integration with pavers, and more standardized construction.

    Timber can be acceptable if the wall is truly low and non-critical, but drainage still matters.

    Wall Holding a Real Grade Change

    Segmental block is often the most practical option because it can be designed around geogrid, drainage stone, and a consistent setback. Natural stone may also work, but the wall must be built for the actual height and soil conditions, not simply stacked for appearance.

    Slope That Needs Terracing

    Segmental block is well suited for multiple tiers, steps, raised planting areas, and outdoor living spaces. Terracing can make a steep yard more usable, but the relationship between each wall matters. Upper walls can add load to lower walls if the layout is not planned correctly.

    Kentucky Lake or Lake Barkley Property

    Lakefront work requires more than picking a wall color. Shoreline exposure, steep grades, fluctuating water conditions, access, drainage discharge, erosion concerns, and any applicable property or shoreline requirements should be reviewed before construction.

    For these properties, a site visit is essential. A wall near the water or supporting a lake-facing terrace should be designed around the complete grade and drainage plan.

    Wall Supporting a Driveway or Structure

    Do not treat this as a basic landscape border. A driveway, building, deck, or other structure above the wall creates additional loading. The project may require an engineered design, geogrid reinforcement, deeper excavation, or other site-specific measures.

    This is where material selection should follow the structural requirements, not the other way around.

    / Dept 04: What It Costs to Plan

    You can put a real number on the project without pretending every property is the same.

    A retaining wall installation in our service area generally falls within a planning range of $35–$70 per face foot, depending on material and job conditions.

    That range can change based on:

    • Wall height and total length
    • Excavation difficulty
    • Clay, rock, or unstable soil
    • Drainage requirements
    • Geogrid and reinforcement
    • Access for equipment
    • Steps, curves, caps, and integrated patios
    • Lakefront or steep-slope conditions

    For a more detailed explanation, read our retaining wall cost guide for Paducah and Western Kentucky.

    Completed retaining wall and paver patio installation integrated into a sloped property

    / Dept 05: Why Contractor Selection Matters

    The best material cannot rescue a careless installation.

    When you compare retaining wall contractors near you, ask how the contractor handles:

    • Base excavation and compaction
    • Drainage stone and perforated pipe
    • Geogrid and reinforcement
    • Wall setback and batter
    • Surcharges from driveways or structures
    • Final grading and water discharge
    • Caps, steps, and transitions

    The Muscle is a Unilock Authorized Contractor. For you, that means access to Unilock systems and manufacturer-backed material and warranty support, subject to the applicable product and installation requirements. It is a useful trust signal, but it does not replace a site-specific evaluation or proper construction.

    Our team stays involved from site review through installation. We are insured, trained for hardscape work, and accountable for the details behind the finished wall.

    Make the Right Call Before You Build

    If your wall is already leaning, separating, bulging, or showing drainage problems, review our guide to engineered retaining wall solutions before adding more soil or landscaping.

    If the wall will support a patio, fire feature, or outdoor living area, see our Western Kentucky outdoor living cost guide and paver installation guide.

    Then Request a Bid. We will look at the slope, drainage, access, and intended use, then put a real number on the work, no pressure and no obligation.

    You can also call (270) 248-9790 or review the Contractor Packet if you are planning a larger residential, commercial, or property-improvement project.

  • Paver Driveway vs. Poured Concrete: Which One Survives a Kentucky Winter?

    Paver Driveway vs. Poured Concrete: Which One Survives a Kentucky Winter?

    Your driveway takes more abuse than almost any other hardscape on your property.

    It carries daily traffic, delivery trucks, work vehicles, and sometimes a snowplow. It absorbs summer heat, heavy rain, de-icing salt, and repeated freeze-thaw movement. When Western Kentucky clay soils shift underneath it, the driveway has to respond without losing its grade or falling apart.

    That is why homeowners in Paducah, Mayfield, Murray, Benton, Calvert City, Kentucky Lake, and Lake Barkley often compare two options: paver driveway installation or poured concrete.

    Both can be built well. Neither performs well when the base, drainage, or installation is treated as an afterthought.

    Here is the honest comparison.

    Request a Bid from The Muscle for a driveway evaluation and a clear project number based on your property.

    / Dept 01: The Kentucky Problem

    The surface is only as strong as what is underneath it.

    Western Kentucky presents a difficult combination for driveways: clay soils, changing moisture levels, heavy rainfall, and winter freeze-thaw cycles.

    Clay expands when it absorbs water and contracts as it dries. If water remains trapped beneath a driveway, freezing can push sections upward. When the ground settles again, the surface may not return to its original position.

    That movement affects both concrete and pavers. The difference is how each system responds.

    A poured concrete driveway is a rigid slab. When the soil moves unevenly, the slab has limited ability to flex. It may crack through the field, separate at control joints, settle at the edges, or develop surface damage from moisture and de-icing products.

    A paver driveway is a flexible, modular system. Individual units can move slightly with the base and remain interlocked when the installation is engineered correctly.

    The key phrase is when the installation is engineered correctly. Pavers are not a shortcut around poor drainage or weak base preparation.

    Compacted aggregate base preparation for a residential paver driveway

    / Dept 02, Poured Concrete

    Concrete is practical, familiar, and not automatically the wrong choice.

    Poured concrete remains a reasonable driveway material for many homeowners. It creates a smooth surface, works with a wide range of home styles, and can be installed efficiently when the site is accessible and the base is properly prepared.

    Concrete may be the right call when:

    1. Your budget favors lower initial investment.
      A basic concrete driveway is often less expensive upfront than a fully installed paver system.

    2. You prefer a continuous, simple surface.
      Concrete has clean visual lines and no individual joints between pavers.

    3. The site has stable, well-drained soil.
      Good soil conditions reduce the movement that causes problems in rigid slabs.

    4. The driveway has a straightforward layout.
      Simple access, moderate grades, and limited drainage complications can make concrete a sensible solution.

    5. You are comfortable with the repair limitations.
      Concrete can last for years when properly designed, placed, cured, and maintained. However, cracking remains a possibility in our climate even when the work is done correctly.

    Control joints help direct where concrete is likely to crack. They do not make the slab immune to cracking. Soil movement, water beneath the slab, improper curing, and freeze-thaw cycling can still create damage outside the planned joint lines.

    De-icing salt can also contribute to scaling and surface deterioration, particularly when concrete is not properly specified, cured, or protected. Concrete should be designed for local winter conditions rather than treated as a one-size-fits-all product.

    / Dept 03: Paver Driveways

    Pavers earn their cost through flexibility and repairability.

    An engineered paver driveway is built in layers. The existing material is excavated, the subgrade is addressed, and a compacted aggregate base is installed at the depth required for the site and expected loads.

    The finished surface depends on more than the paver itself.

    A reliable installation typically includes:

    1. Proper excavation.
      Weak or unstable material must be removed rather than buried beneath the driveway.

    2. A compacted aggregate base.
      The base distributes vehicle loads and provides a stable working platform. It should be installed and compacted in controlled lifts, not dumped in one thick layer.

    3. Accurate grading.
      The driveway needs positive drainage away from the garage, foundation, and low areas of the property.

    4. Secure edge restraint.
      Without strong edges, pavers can spread or migrate under repeated vehicle loading.

    5. Tight, properly filled joints.
      Polymeric sand can help stabilize joints and reduce weed growth and water intrusion when installed according to product requirements.

    6. A pattern suited to vehicle traffic.
      The design should account for turning movements, heavy loads, and the way vehicles enter and leave the property.

    The visible pattern matters. The invisible construction matters more.

    As a Unilock Authorized Contractor, The Muscle works with manufacturer-supported products and installation practices for hardscape projects. That does not eliminate site-specific decisions, but it adds a useful standard when you are comparing hardscaping contractors.

    Finished paver driveway detail showing tight joints, clean cuts, and defined edging

    / Dept 04: The Real-World Comparison

    Repairability

    This is one of the clearest differences.

    A cracked concrete slab is usually patched, saw-cut, or replaced. Repairs may remain visible, and one damaged area can be a sign that the surrounding base or drainage needs attention.

    Pavers can be lifted and relaid. If a section settles near a downspout, utility trench, or soft spot, the affected units can be removed, the base corrected, and the same pavers installed again.

    That does not mean pavers never move. It means movement can often be corrected without demolishing the entire driveway.

    Heavy trucks

    Both materials can support heavy vehicles when designed for the intended use.

    Concrete depends heavily on slab thickness, reinforcement details, concrete mix, control joints, and the quality of the supporting base. A driveway used by work trucks, RVs, trailers, or delivery vehicles should not be built to the same assumptions as a light residential drive.

    Pavers distribute loads through the interlocking surface and aggregate base. A professional should still account for the weight, turning patterns, and frequency of heavy traffic before determining the installation details.

    If a dump truck will routinely use the driveway, say so before the bid is prepared.

    Snowplows

    A well-built paver driveway can handle snow removal, but the details matter.

    Edges should be secure and transitions should be flush. Loose or uneven pavers can catch a plow blade. Properly filled joints and a stable surface reduce that risk.

    Concrete is simple to plow because it is continuous. However, a plow blade can still damage a surface if it digs into a raised section or catches deteriorated concrete.

    For either material, communicate the intended snow removal method before construction. That is especially important around garage thresholds, drainage grates, curbs, and transitions.

    De-icing salt

    Concrete can suffer from scaling and surface deterioration when exposed to repeated salt and freeze-thaw cycles. Salt should be used carefully and according to the material manufacturer’s recommendations.

    Quality concrete pavers are dense and designed for exterior use, but they are not indestructible. Poor drainage, weak joints, and improper cleaning practices can still create problems.

    The best defense for either driveway is controlled water, proper construction, and sensible winter maintenance.

    Curb appeal and resale

    Concrete is clean and functional. Pavers provide more room for design.

    You can use contrasting borders, multiple sizes, directional patterns, and colors that connect the driveway to the home’s brick, stone, walkways, or patio. A driveway that looks intentional can improve the first impression of the property.

    That does not guarantee a specific resale return. It does give the property a more finished appearance and may help the driveway feel like part of the home rather than a leftover slab.

    / Dept 05: How Much Does a Paver Driveway Cost?

    Plan for the site, not just the square footage.

    A paver driveway usually requires a higher upfront investment than basic poured concrete. The reason is not simply the price of the pavers. The project includes excavation, aggregate, compaction, edge restraint, cuts, drainage, labor, access, and disposal.

    A realistic planning range moves from straightforward to complex based on:

    • Driveway size and width
    • Existing asphalt or concrete removal
    • Western Kentucky clay and subgrade conditions
    • Required excavation depth
    • Drainage corrections
    • Slope and elevation changes
    • Curves, borders, and specialty patterns
    • Access for equipment and material delivery
    • Expected truck, trailer, or RV traffic
    • Connections to walkways, patios, or retaining walls

    A simple replacement with good access and stable grades is a different project from a lakefront driveway with slope concerns, drainage challenges, and multiple transitions.

    There is no responsible way to put one universal number on every property. Request a Bid, and The Muscle will evaluate the actual conditions before putting a real number on the work.

    For related planning, see our guides on paver installation and paver patio costs in Paducah.

    / Dept 06, Which One Should You Choose?

    Choose the material that matches your property and your expectations.

    Poured concrete may be the right answer if you want a straightforward surface, have favorable site conditions, and are prioritizing initial cost.

    Pavers may earn their cost if you:

    • Plan to stay in the home long term
    • Deal with shifting clay or recurring drainage problems
    • Want easier localized repairs
    • Use de-icing salt during winter
    • Expect frequent heavy vehicle traffic
    • Want stronger design integration with patios, walkways, or walls
    • Care about replacing sections without removing the entire driveway

    For Kentucky Lake and Lake Barkley properties, drainage deserves extra attention. Sloped lots and lakefront terrain can move water toward driveways, garages, foundations, or lower portions of the property. A paver driveway can be part of the solution, but only when the grade and drainage plan are handled from the beginning.

    If water is already washing across your drive or collecting beside the garage, review our guide on common yard drainage problems before choosing a surface.

    / Next Step: Build It Once

    Your driveway should be engineered for the ground it sits on.

    The right driveway is not selected by color alone. It is selected by soil, drainage, traffic, maintenance expectations, and how the property needs to function.

    The Muscle serves Western Kentucky, Southern Illinois, and Northern Tennessee with professional hardscape installation backed by honest communication and upfront pricing. We are a Unilock Authorized Contractor, and we focus on the base work and drainage details that determine whether a finished driveway stays dependable.

    Request a Bid online or call (270) 248-9790. No pressure. We will look at the property, discuss your goals, and explain the practical options.

    You can also review the Contractor Packet to learn more about our process and capabilities.

  • How Much Does Land Clearing Cost in Western Kentucky? 2026 Pricing Guide

    How Much Does Land Clearing Cost in Western Kentucky? 2026 Pricing Guide

    If you have overgrown acreage, fallen trees, heavy brush, or a lot that needs to become build-ready, the first question is usually straightforward:

    How much will land clearing cost?

    The honest answer is that no responsible contractor can price the work accurately from acreage alone. A one-acre pasture with light brush is a very different job from a one-acre wooded hillside with stumps, wet clay, limited access, and several dump-trailer loads of debris.

    For planning purposes, Western Kentucky land clearing commonly falls into a broad range of approximately $1,200 to $6,000 or more per acre, depending on the site. That is a ballpark: not a quote. Your exact number depends on what is growing there, what needs to leave, and what you want the property ready for afterward.

    The Muscle provides land clearing, excavation, grading, and site preparation across Western Kentucky, Southern Illinois, and Northern Tennessee. We come out, look at the property, and put a real number on the work. No hidden add-ons. No pressure.

    / Dept 01 : What Land Clearing Costs in Western Kentucky

    The condition of the property matters more than the acreage on the listing.

    Here are practical planning ranges for 2026:

    Site condition Ballpark planning range
    Light grass, weeds, and brush Approximately $1,200–$2,000 per acre
    Medium brush, fence rows, and saplings Approximately $2,000–$3,500 per acre
    Heavy brush with scattered small and medium trees Approximately $3,000–$4,500 per acre
    Dense woods, mature hardwoods, stumps, and difficult terrain Approximately $3,500–$6,000+ per acre

    These figures are intended for early planning only. Public cost references such as Kentucky land-clearing cost data and broader land-clearing cost guides show how widely the work can vary by vegetation, access, disposal, and site preparation requirements.

    A smaller lot may cost more per acre than a larger tract because equipment mobilization, setup, and hauling are spread across less ground. A multi-acre project may have a lower per-acre rate but a higher total investment.

    The site still has to be inspected.

    / Dept 02 : The Five Cost Drivers

    The number on your bid should explain what is being cleared, moved, removed, and left behind.

    Several items drive the final price.

    1. Acreage and work area

      The total acreage matters, but so does the portion that actually needs to be cleared. You may own ten acres but only need a house pad, driveway, septic area, and access path cleared. Defining the work area correctly can prevent you from paying to clear land you plan to leave wooded.

    2. Brush and tree density

      Light weeds and brush can often be handled quickly. Dense saplings, tangled vines, fallen timber, and mature hardwoods require more cutting, machine time, and cleanup.

    3. Stump removal

      Cutting a tree down is not the same as removing the stump. If you need a clean, buildable area, stumps may need to be pulled, dug out, or ground down. Root balls also leave holes that must be filled and compacted.

    4. Slope and ground conditions

      Western Kentucky properties can range from flat agricultural ground to steep, rocky lakefront lots. Slopes slow equipment, increase maneuvering requirements, and may require more careful erosion and drainage planning.

      Western Kentucky clay soils create another variable. Wet clay can rut easily, hold equipment, and become difficult to grade cleanly. Timing the work around ground conditions matters.

    5. Access and debris handling

      A clear entrance for an excavator, skid steer, tractor, or dump trailer keeps the job moving. Narrow gates, fences, overhead lines, wet ground, and long travel routes across the property can increase labor.

      You will also need to decide what happens to the debris. Brush may be mulched or stacked. Logs may be left for the property owner. Stumps, trash, and excess material may need to be hauled off. Disposal is not free, and it should be addressed in the original scope.

    Excavator performing controlled dirt work and site preparation near a residential property

    / Dept 03 : Clearing Is Not Always the Same as Build-Ready

    Knocking down trees is only the first phase when you are preparing to build.

    Some land-clearing contractors stop after vegetation is cut and pushed into piles. That may be enough for a hunting path or basic brush cleanup. It may not be enough for a home, shop, driveway, patio, pond area, or commercial improvement.

    Ask what “cleared” means before comparing bids.

    Your project may also require:

    • Stump and root removal.
    • Topsoil stripping.
    • Rough grading.
    • Cut-and-fill work.
    • Driveway or access-road preparation.
    • Drainage swales or culvert work.
    • Moving soil to another area of the property.
    • Hauling excess dirt, logs, brush, or rock away.
    • Preparing a stable area for a foundation, hardscape, or future landscape installation.

    If your goal is a build-ready lot, connect land clearing with the next phase. The Muscle also provides dirt work and grading, including site preparation, driveway leveling, drainage installation, and material spreading.

    For a deeper look at what should happen before construction, read our related guide: Grading and Excavation Near Me: What a Professional Contractor Should Do Before You Build.

    / Dept 04 : Why Fall and Winter Are Often the Best Time

    Clearing dormant ground now can put your property ahead before spring construction season.

    Fall and winter are often productive seasons for land clearing in Western Kentucky.

    With leaves down and vegetation dormant, the operator can see the property more clearly. Property lines, fence rows, drainage paths, dead trees, and terrain changes are easier to evaluate. Cooler conditions can also make extended equipment work more manageable.

    That does not mean every winter day is suitable. Saturated clay, deep mud, ice, and freeze-thaw conditions can limit access or damage the work area. A professional contractor should consider the ground before bringing heavy equipment onto the property.

    The planning advantage is simple: clearing during the colder months can give you time to address grading, drainage, utilities, permits, surveys, and construction scheduling before spring.

    It can also help you get on the calendar before the busiest hardscape and landscape installation season fills up.

    If you are hoping to build, install a driveway, add a paver patio, or develop a lakefront property next year, do not wait until the ground is green and every contractor’s schedule is full.

    Land clearing and grading work on a steep waterfront property

    / Dept 05 : Equipment That Handles the Whole Job

    The right equipment turns a messy lot into a controlled worksite.

    The Muscle owns and operates equipment for more than basic tree cutting, including:

    • Excavators for digging, stump removal, trenching, and controlled grading.
    • Skid steers for pushing, loading, and moving material.
    • Tractors for clearing, grading, and spreading.
    • Chainsaws for trees, limbs, and selective cutting.
    • Dump trailers for moving debris, soil, rock, and other material.

    That capability matters when your project needs to move from overgrown to usable without handing every phase to a different contractor.

    A lakefront property may require controlled work on a slope. A wooded lot may need selective clearing around trees you want to keep. A future home site may need brush removal followed by rough grading and access preparation.

    The equipment approach should match the property: not the other way around.

    Excavator working beside a home during site preparation and drainage work

    / Dept 06 : What a Clear Land-Clearing Bid Should Include

    A good bid tells you what is included before the machines arrive.

    Before hiring a contractor, ask whether the proposal explains:

    1. The exact area to be cleared.
    2. The type and density of vegetation.
    3. Whether trees are cut, mulched, stacked, or hauled away.
    4. Whether stumps and major roots are included.
    5. How brush, logs, and debris will be handled.
    6. Whether rough grading is included or priced separately.
    7. Whether drainage, culverts, or driveway work are part of the scope.
    8. How access limitations affect the work.
    9. Whether excess dirt or rock will remain on-site or be hauled off.
    10. What happens if buried debris, unsuitable soil, or unexpected rock is found.

    This is where transparent pricing makes a difference. The Muscle believes in honest upfront numbers and straightforward communication. We are fully insured, and our team stays involved in the work instead of treating your property like a quick drop-in job.

    / Dept 07 : Get the Real Number for Your Property

    A site visit is more useful than an online calculator.

    Online estimates can help you understand the general scale of land clearing. They cannot see your slope, clay, access, stump count, drainage problems, or debris volume.

    If you are clearing property in Murray, Paducah, Mayfield, Benton, Calvert City, around Kentucky Lake or Lake Barkley, or in nearby Southern Illinois and Northern Tennessee, call The Muscle at (270) 248-9790.

    You can also request a bid online. Tell us:

    • How many acres you own.
    • What the property looks like now.
    • Whether you need trees, brush, and stumps removed.
    • What you want to build or install afterward.
    • Whether debris should be hauled away.
    • Whether the site has a slope, drainage issue, or limited access.

    We will come take a look and put a real number on it.

    No pressure. No obligation. No surprise line items added after the work starts.

    Commercial property owners can also review the Commercial Contractor Packet before requesting a bid.